AI insight board
The AI Insights Board helps users quickly understand their data by automatically generating and combining narrative insights, observations, and recommendations in a unified view using AI. Instead of manually building dashboards or interpreting multiple charts, users can upload their dataset and, with just a few steps, create an AI-generated Insights Board presented in clear, easy-to-read text format.
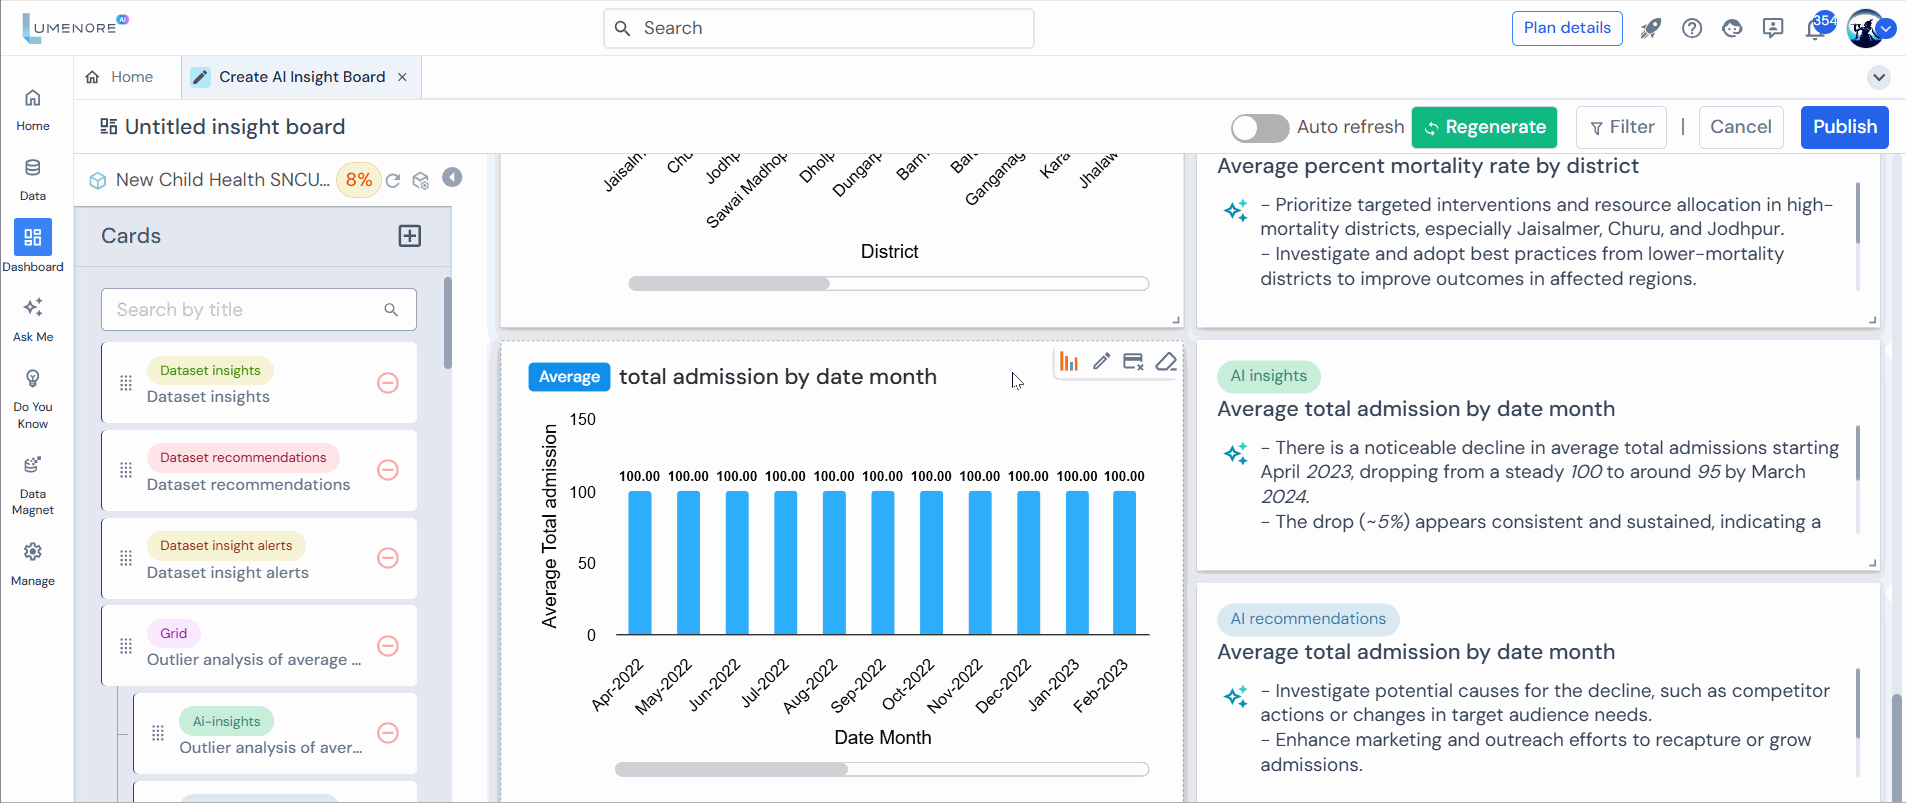
The AI analyzes the uploaded data to identify important trends and patterns, while also highlighting critical insight alerts when significant changes—such as sudden spikes or declines—are detected.
To provide additional context, users can enhance the Insights Board by adding relevant KPIs, charts and refine AI-generated insights at the chart or KPI level. This ensures a balanced combination of AI-driven narrative insights and supporting visual data within a single, unified space.
Key Benefits:
- Increased Efficiency: Automates the creation of detailed executive summaries, saving considerable time and effort.
- Advanced Analysis: Delivers sophisticated insights, such as forecasts and correlations, to support data-driven decisions.
- Customizable Reports: Allows users to tailor reports to meet their specific needs and preferences.
- Professional-Grade Presentations: Generates polished, presentation-ready reports ideal for executive meetings and strategic discussions.
- Empowers All Users: Enables users without advanced data visualization skills to easily create professional insights boards.
- Deeper Insights: Provides AI-driven recommendations and advanced analysis for more meaningful insights.
- Collaboration: Facilitates easy sharing and collaboration through intuitive, visually engaging dashboards.
The steps to learn how to use the AI-powered Insights Board are outlined below:
Step 1: Open the URL, www.lumenore.com.
Step 2: Sign in with your credentials or sign up to create a new account.
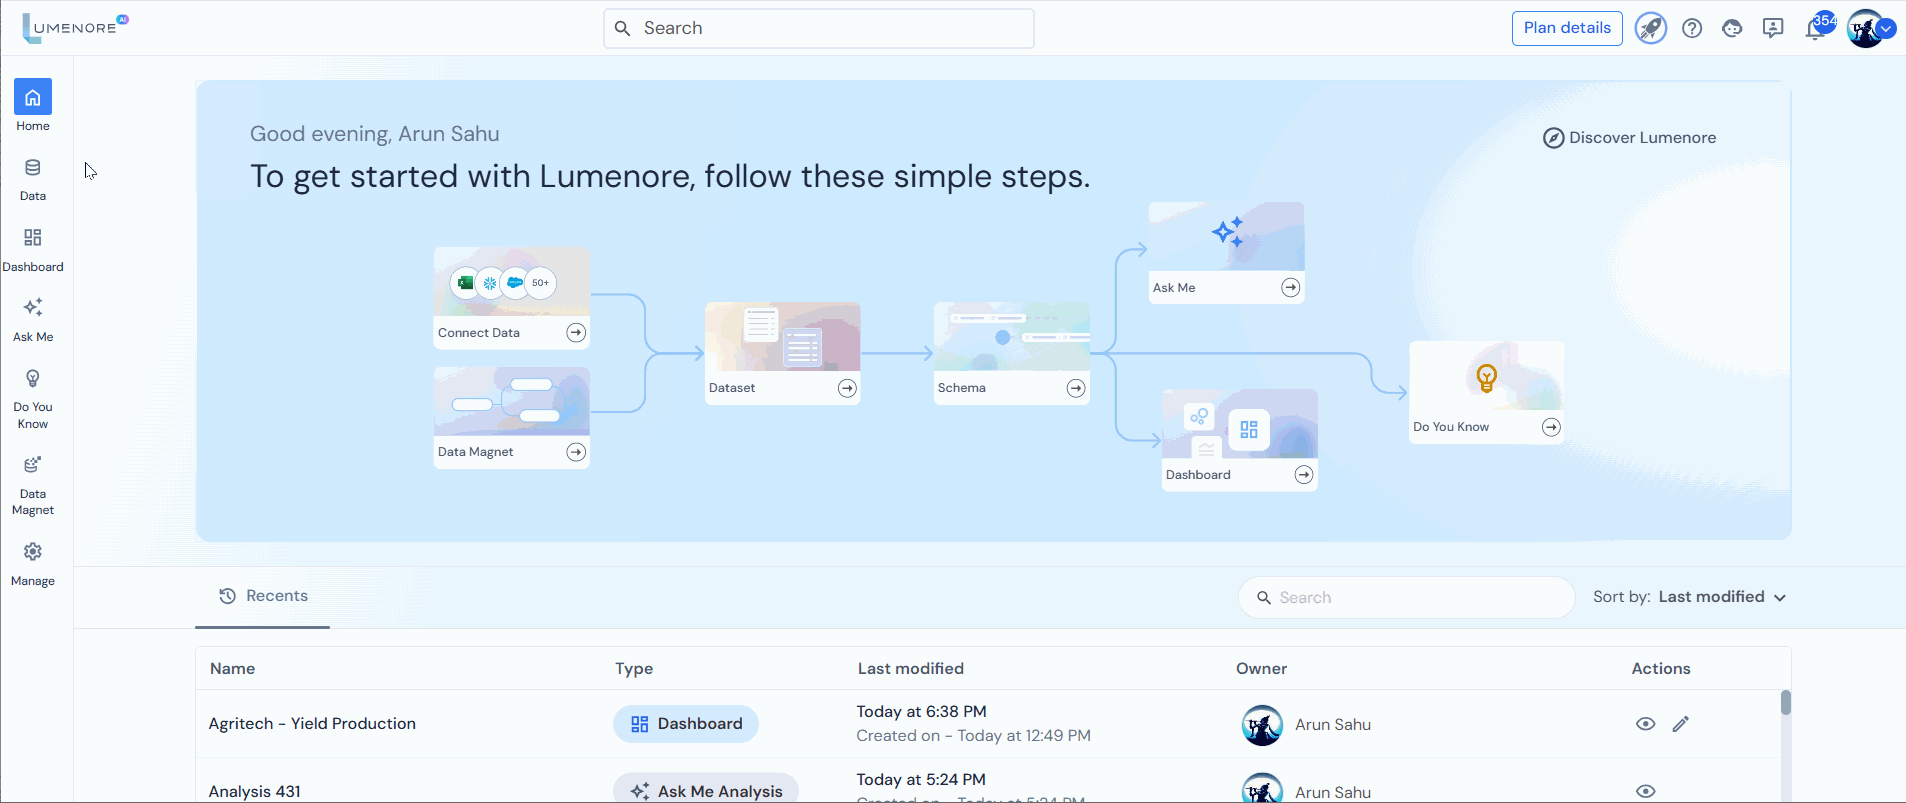
Step 3: After opening Lumenore, access “AI Automated Dashboard” either from the homepage or the Dashboard.
Step 4: You’ve two options to begin with. First, the user can connect or upload the dataset through different available connections. Second, the user can utilize the previously saved schema.
To know in detail, visit: AI automated dashboard.
Step 5: After selecting the schema, users will have two options: AI Dashboard or AI Insights Board.
Select “AI Insights Board” and click “Proceed.”
Step 6: The Persona screen appears, where users must specify the persona type, date, frequency, focus metrics, and the type of analysis they want to perform.
Users can enable the “Auto” option to automatically include all available metrics in the focus metrics section. If “Auto” is disabled, users can manually select specific metrics for generating insights.
Provided “consent” to use of the data for AI insights.
Once the selections are made, click “Proceed.”

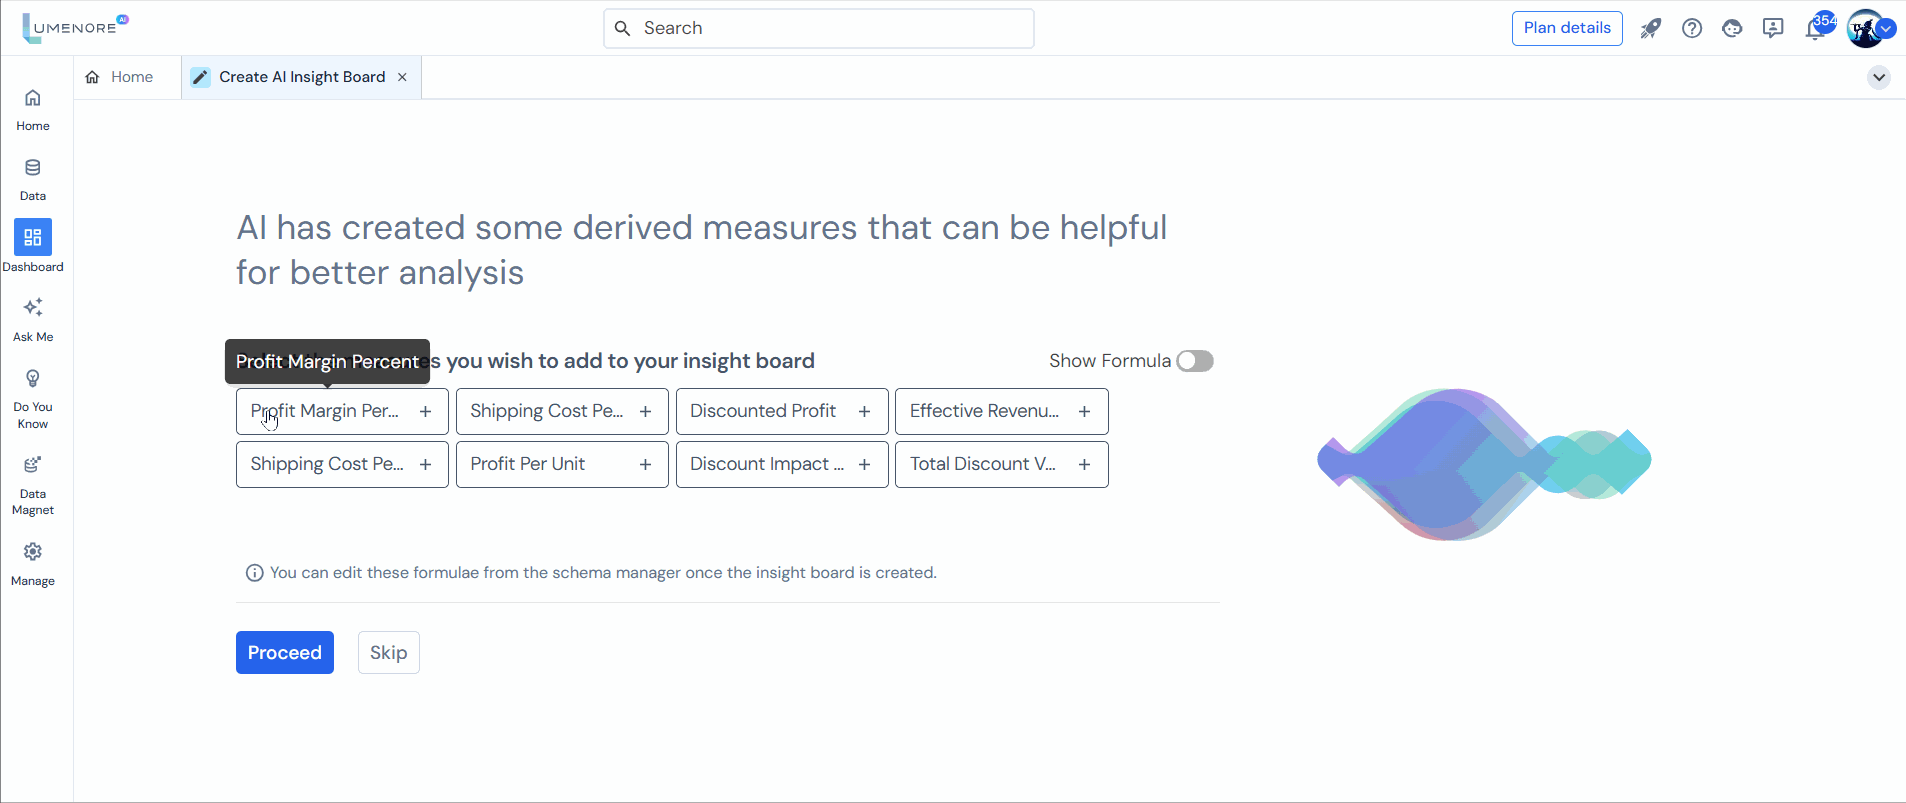
Step 7: After proceeding, the AI will suggest some derived measures to add to the dashboard.
Users can also view and edit the formulas used in these measures from the schema manager once the dashboard is created. If you don’t wish to add any measures, skip proceeding.
The data analysis will begin, and an insights dashboard will be generated.
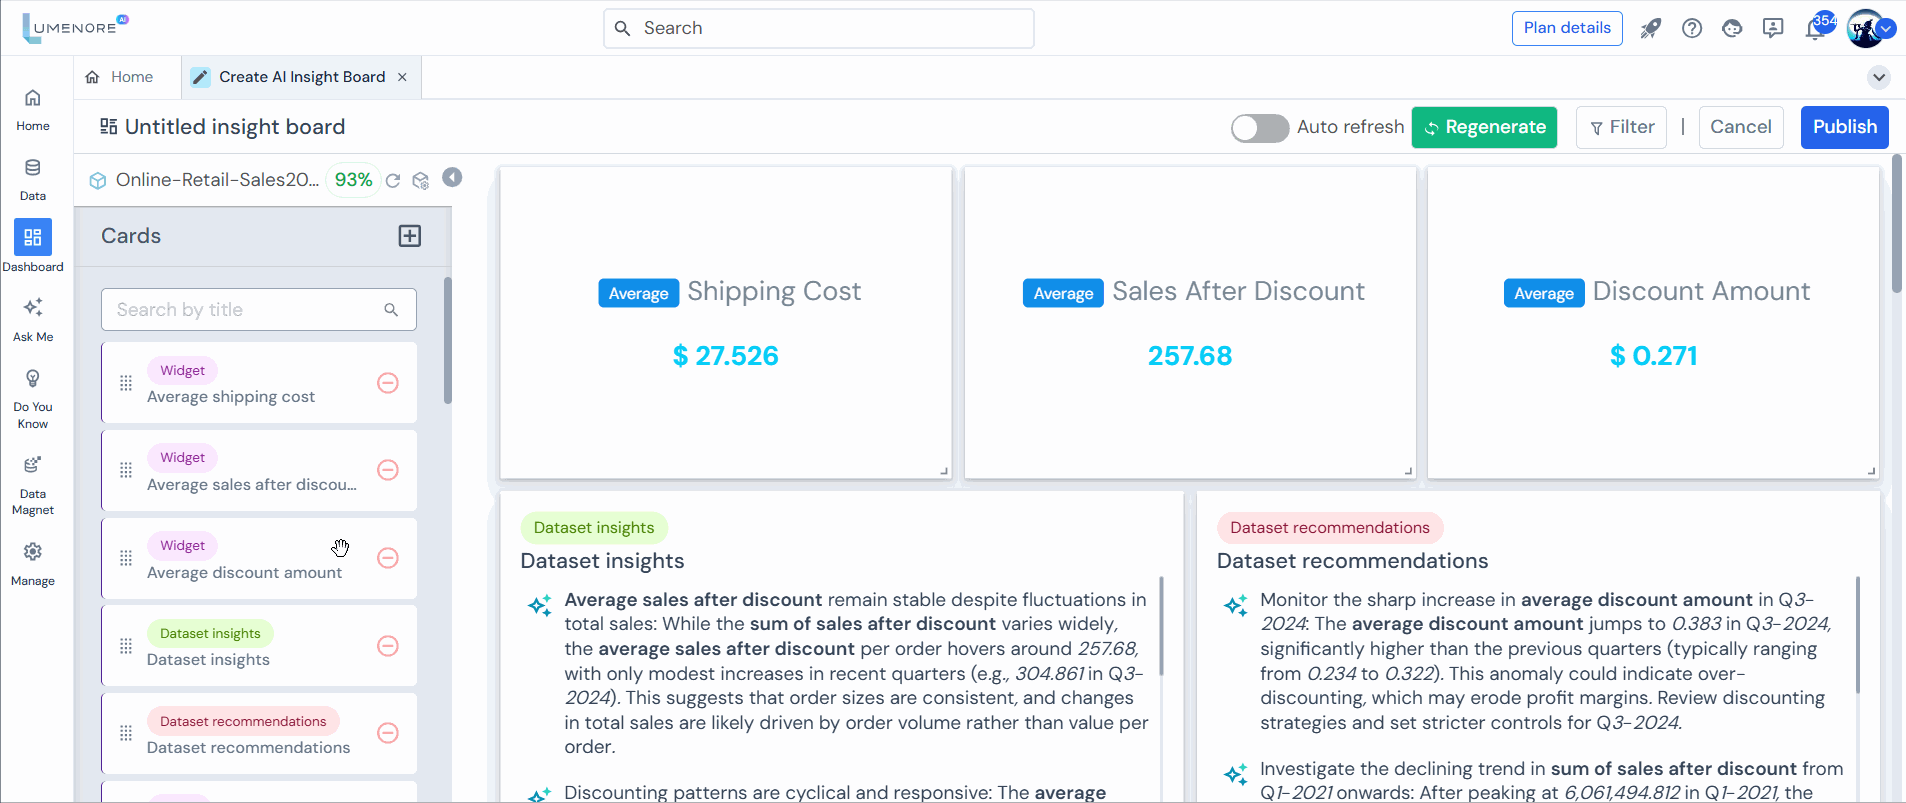
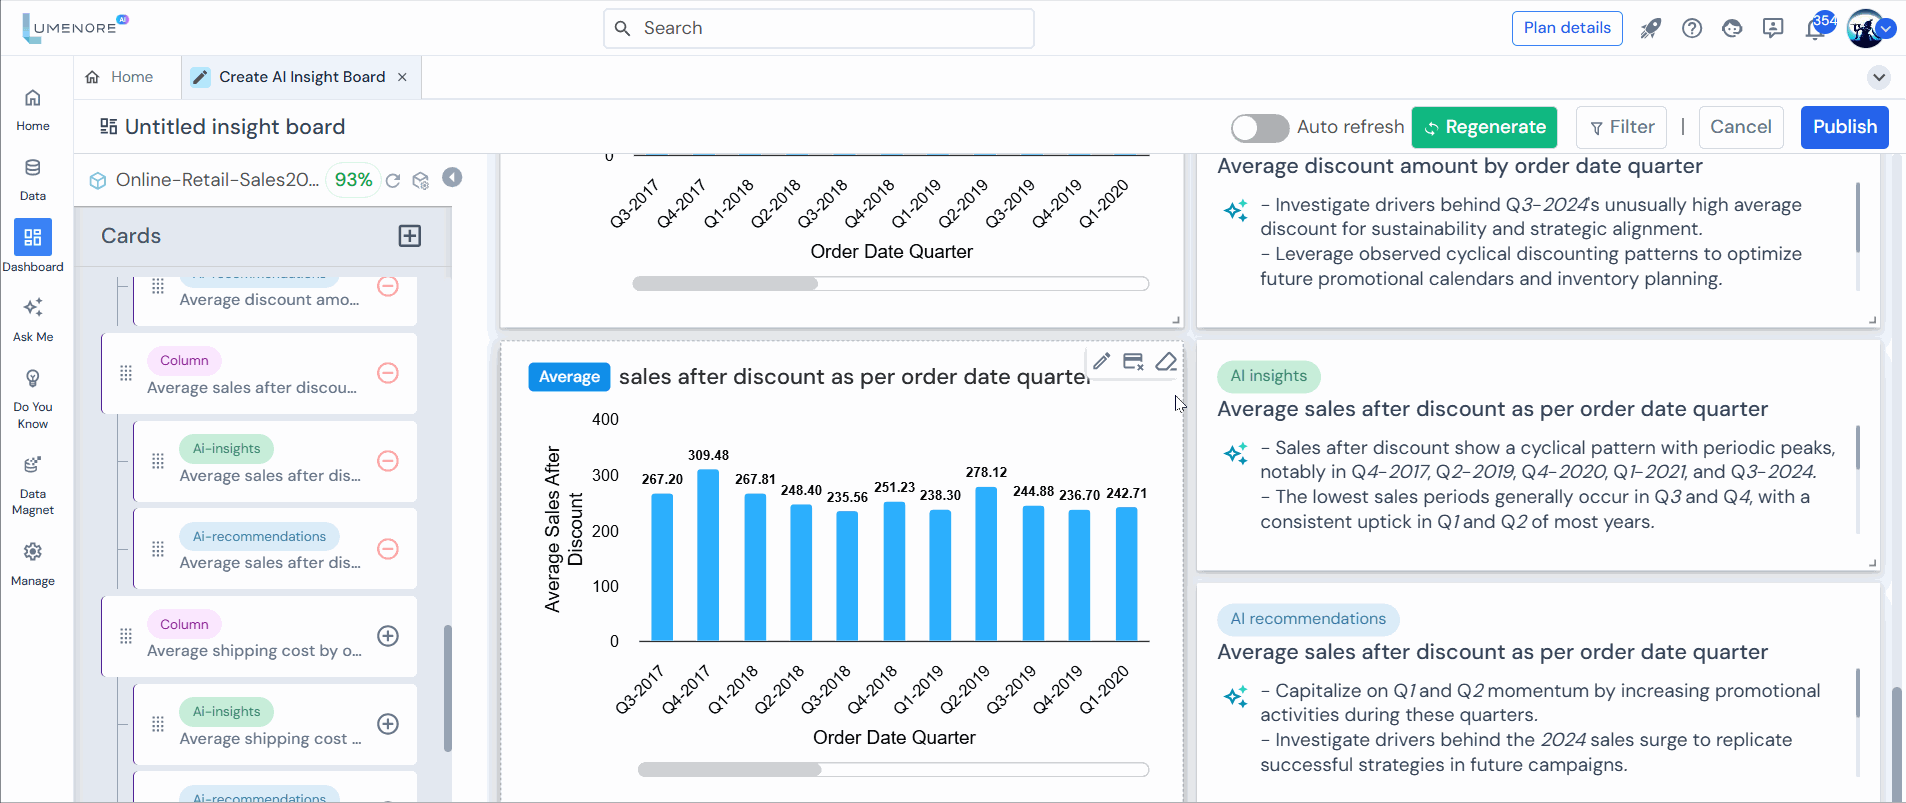
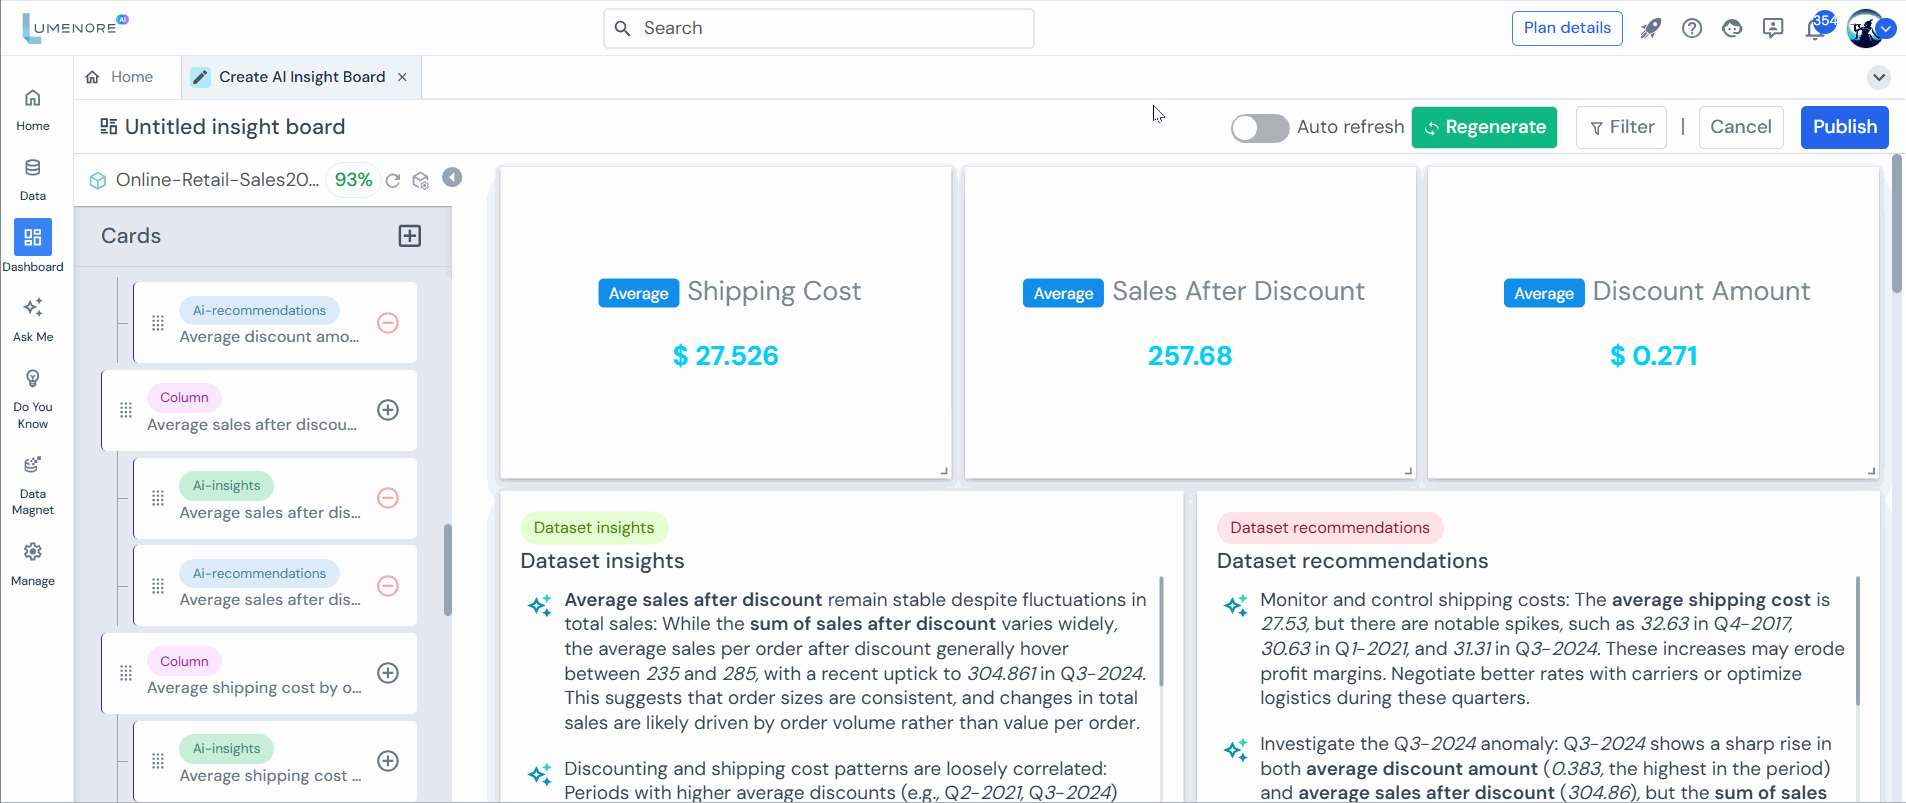
Step 8: Here, users will see three cards displaying dashboard alerts, recommendations, and insights.
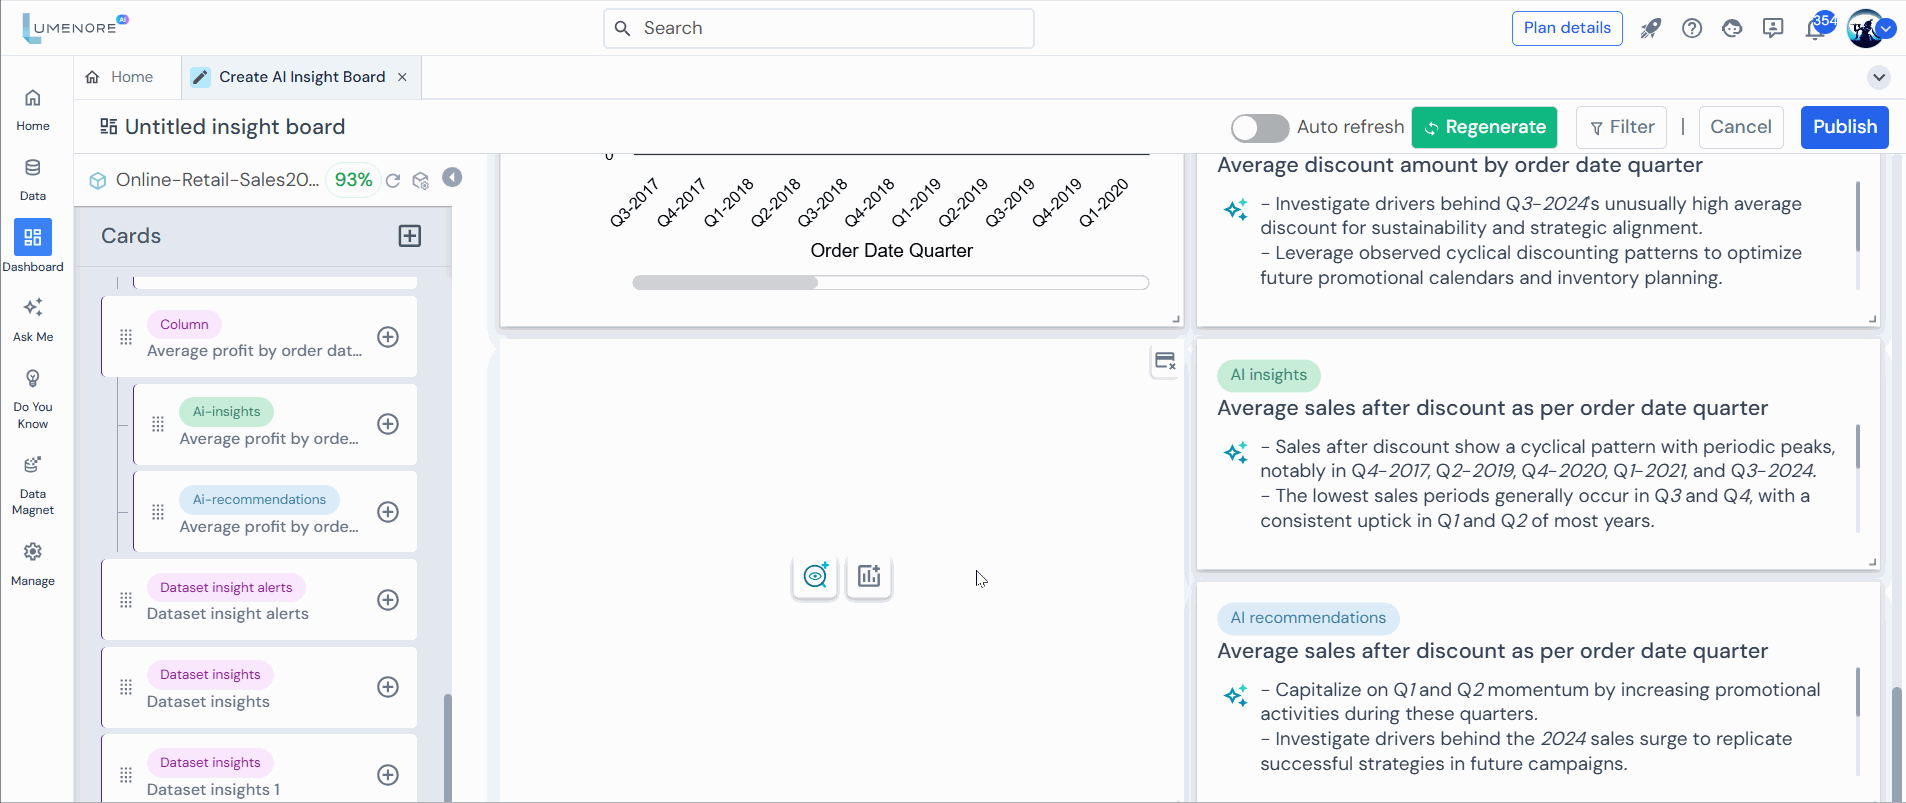
Step 9: To add a card, click the “+” icon, and to remove a card, click the “-” icon.
Features
Edit Title
Here, the user can modify the card header.
Remove Card
It allows users to delete a specific card from a dashboard or user interface, helping to customize and streamline the displayed information.

Clear Card
It allows users to reset or remove all content and customizations from a specific card in a dashboard, returning it to its default state.
After clearing the card, the user is presented with two options: Add Insights or Add KPIs.
Insights
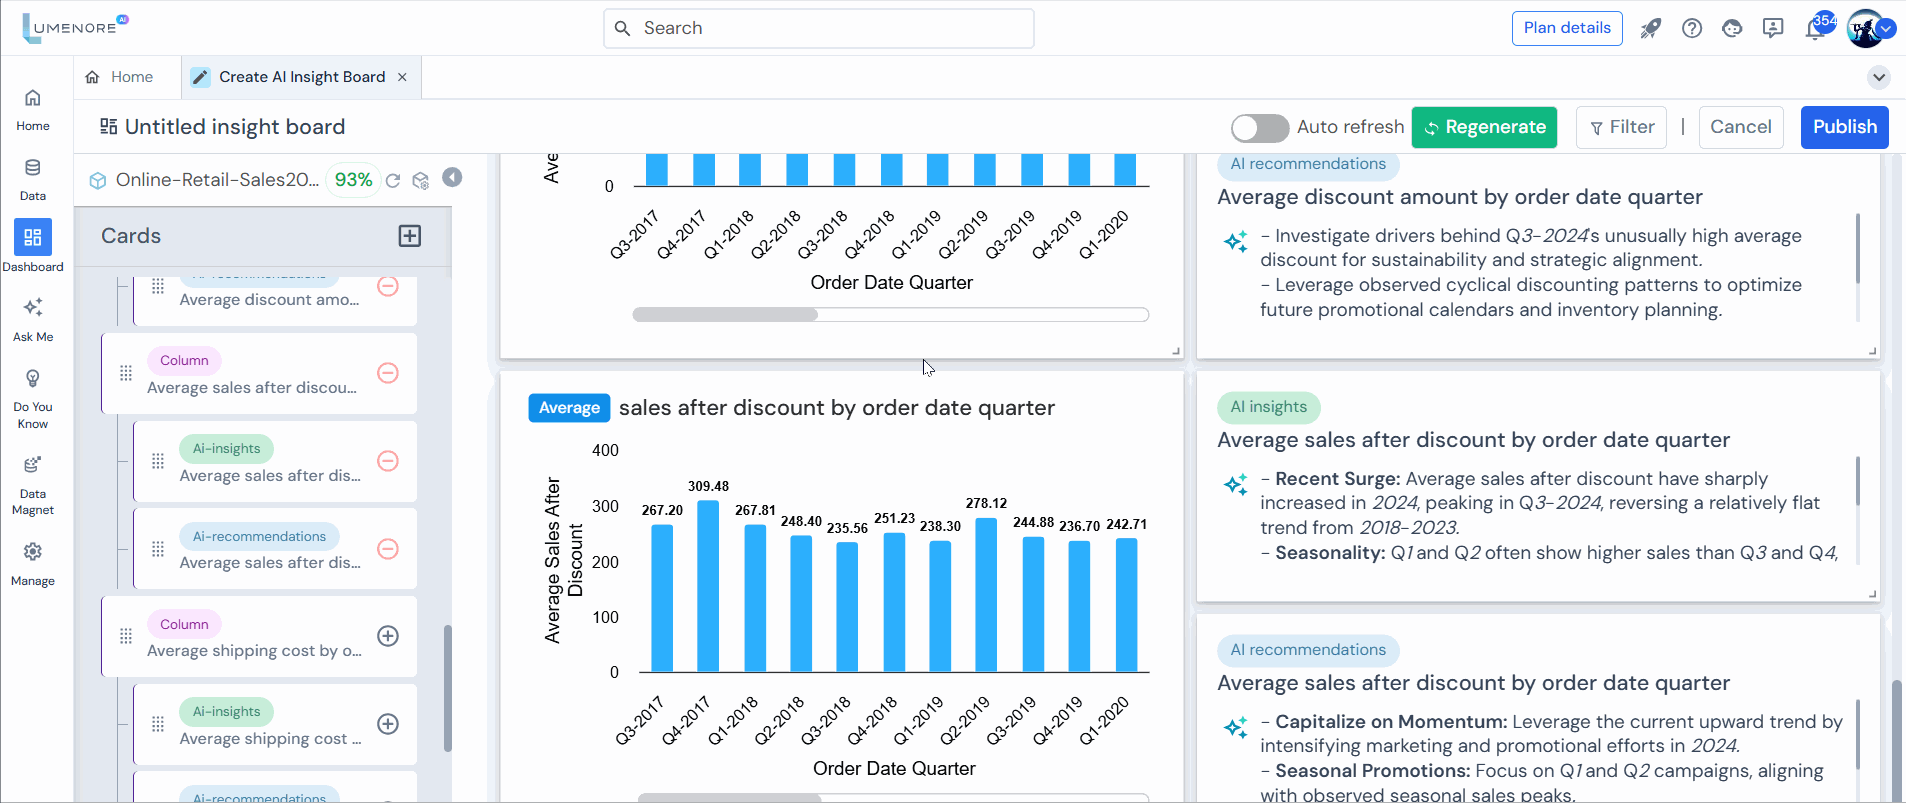
When the user selects Insights, they can then choose a component to proceed with, such as Data Insights, Data Recommendations, Dataset Insight Alerts, Chart AI Insights, or Chart AI Recommendations.

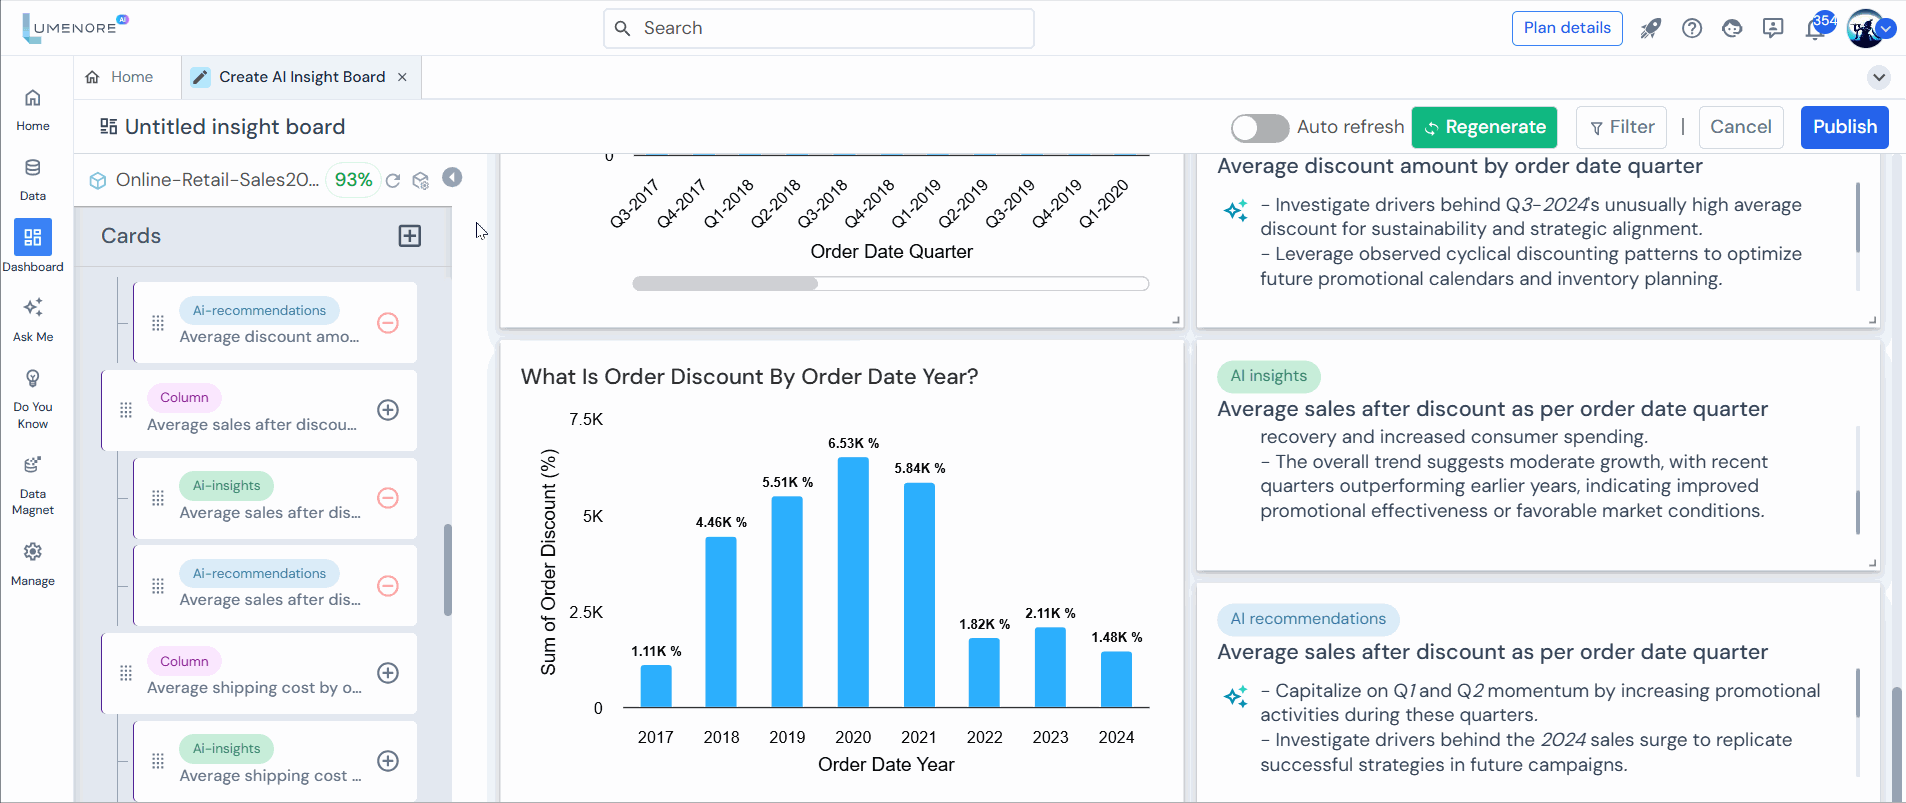
New KPI
When the user clicks New KPI, they can either select a chart from the provided options or type a query to create a new chart.
Refresh and Manage Schema
- Refresh Schema
This action will synchronize all the recent changes made in the schema.
- Manage Schema
Utilize the “Manage Schema” feature to customize the selected schema according to your requirements.
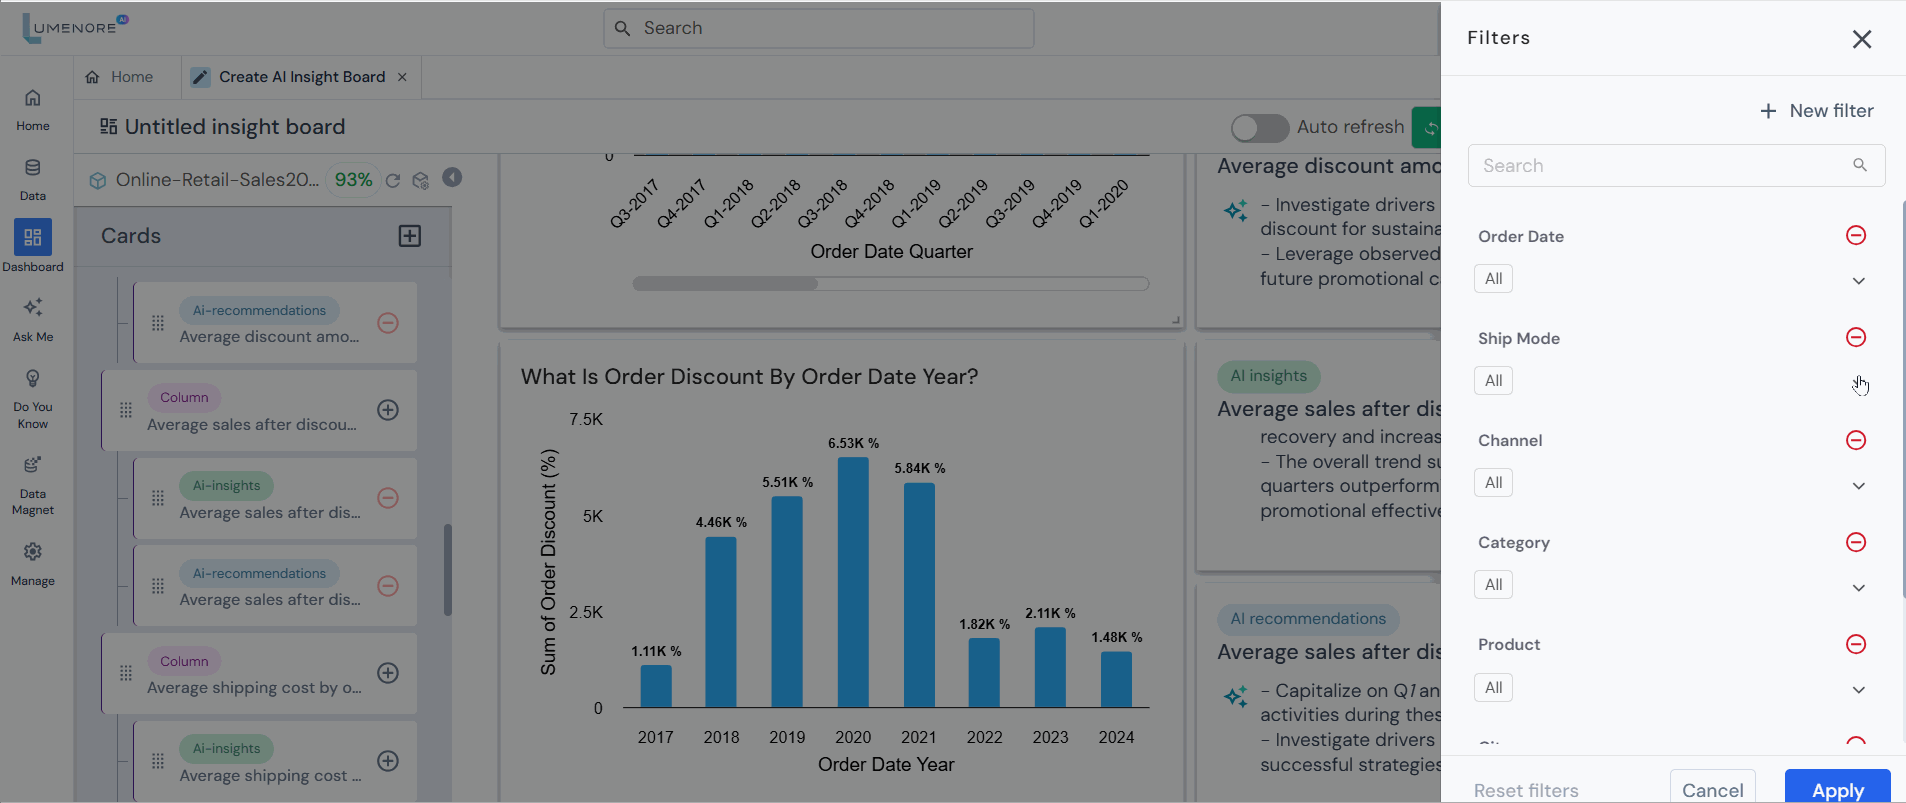
Filter
- Access the filter tab to view the currently applied top filters.
- Add filters by selecting “+” (New filters) and remove filters by clicking the “–” icon.
- Select the values for filtering and confirm your changes by clicking “Apply.”

Apply filter.
Regenerate
Here, users have two options: either regenerate a specific card or regenerate all cards.

Auto Refresh
The “Auto Refresh” feature automatically updates the displayed data at regular intervals. While useful for real-time monitoring, it consumes more Lumenore credits, increasing costs.
It’s best to use this feature selectively to manage costs effectively.
Aggregation Function
You can change the aggregation function by clicking the currently applied one. For example, if the KPI is set to Sum but you want Count, click Sum to view options such as Sum, Count, Average, Minimum, Maximum, and Distinct Count, then select the desired function.

Change Chart Type
It allows users to switch between different chart types (e.g., bar, line, pie, area, spline, column) within a dashboard or data visualization tool. This helps represent and analyze data more effectively to meet specific needs and preferences.
Publish
- Click “Publish.” Provide a name for your insights board, tags (optional), and select a workspace.
- Click “Publish” to publish and view in the dashboard module.
- Congratulations! Your automated AI-powered insights board is now prepared for viewing and in-depth exploration. Delve into the valuable insights it offers and make the most of its capabilities.

Note: Once you choose “View Dashboard,” the dashboard will appear. At the top, you’ll find the edit option, allowing you to make further changes if needed.
For the dashboard interaction feature, click here.
