Create custom charts using code editor
Custom Code
In the Dashboard module, users have the ability to create dynamic and engaging dashboards. However, some users have found it difficult to fully leverage the advanced customization options for creating custom charts. To address this, we’ve made it easier for you to create highly personalized visualizations using JavaScript libraries.
This feature enables you to create custom charts directly within the dashboard, providing greater flexibility to develop visualizations tailored to your specific needs. Whether you’re an advanced user or a beginner, you’ll be able to craft visualizations that go beyond standard chart options easily.
Benefits:
- Custom Chart Creation: Create unique charts using JavaScript libraries for highly tailored visualizations.
- Flexible Visualizations: Ideal for advanced users needing specialized chart types for complex data.
- Improved User Experience: Simplified chart creation will make your dashboards more engaging and easier to use.
Process:
- Accessing the Code Editor:
- The code editor is where you’ll write your custom code.
- It supports JavaScript, HTML, and CSS, and offers helpful features like syntax highlighting to assist in writing and debugging your code.
- The editor is responsive and easy to use, making it suitable for both beginners and experienced developers.
- Preview Your Work:
- A preview box allows you to see your chart in real-time as you write or modify the code.
- This gives immediate feedback so you can adjust your code and see the changes instantly.
- Your custom chart will render directly in the preview box as you work on it.
- Execution Environment:
- The platform runs your JavaScript code in a secure, sandboxed environment, which ensures no malicious code can affect the system.
- Your custom chart will function as expected while keeping the platform secure.
- Saving and Publishing Your Chart:
- Once your custom chart is created, you can save it and come back to edit it later.
- The chart can be embedded into dashboards, becoming part of your interactive visualizations.
- The system will ensure the chart is saved properly and re-renders it during future interactions.
- Error Handling:
- Error messages will appear in a dedicated area (e.g., debug console or error popup).
- The user can view the error message while continuing to work on their chart.
The interface is designed to be intuitive, so even users with little coding experience can start building custom charts quickly. The code editor is fully integrated into the dashboard, eliminating the need to switch between different tools or platforms.
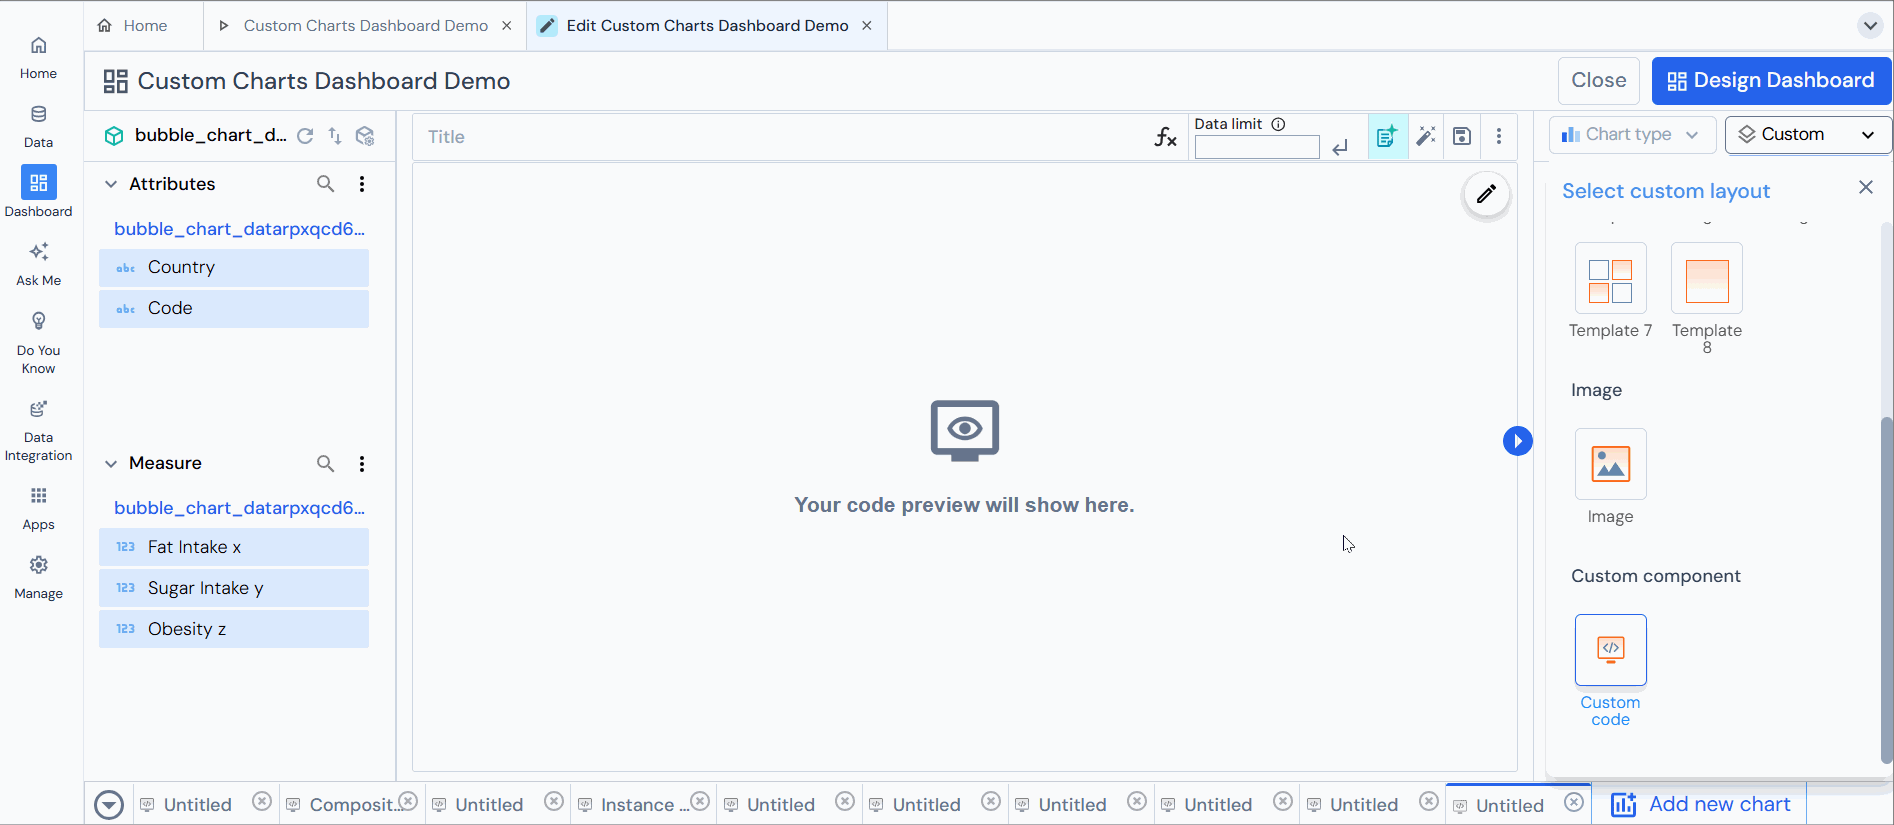
Step 1: Open the dashboard, select the schema, and click “Custom.”

Step 2: Select “Custom code” to begin creating your custom chart, then click on “Edit custom code chart.“
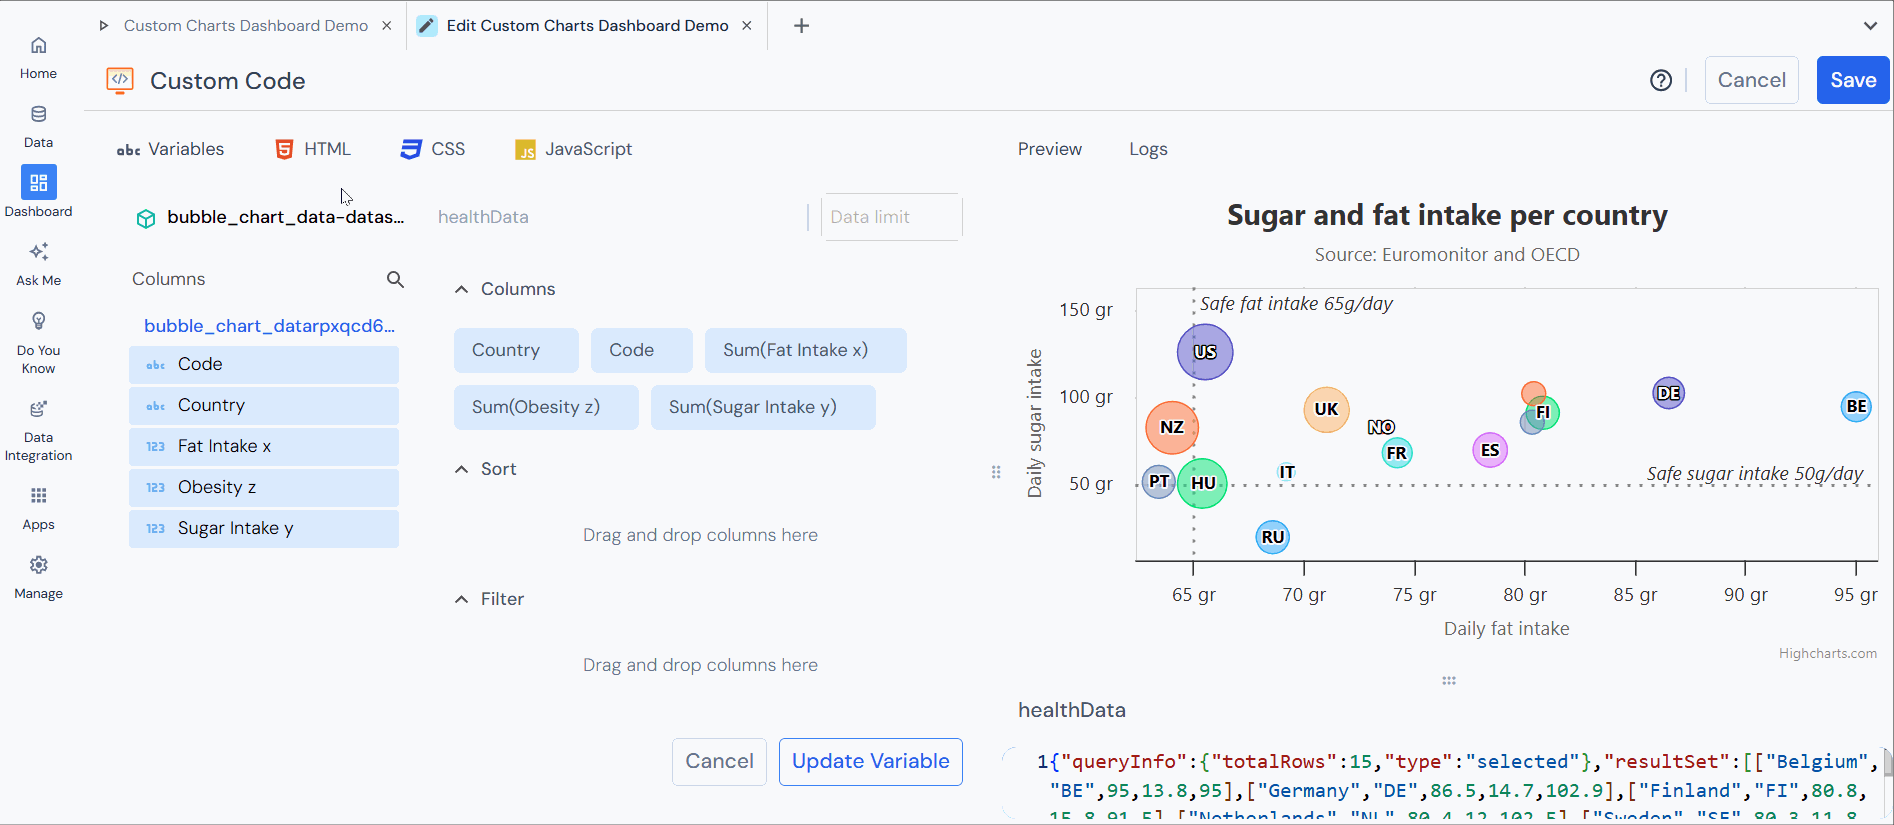
Step 3: Click on “Create variable,” then enter the variable name and specify the data limit.

Step 4: Next, drag and drop the attributes or measures into the columns. You can also sort and apply filters as required. Then “Save Variable.”

Step 5: Users can customize the chart’s structure, style, and behavior using the following options:
- HyperText Markup Language (HTML), where the user can provide a custom code block.
-
- Purpose: Structure the content of a web page.
- Think of it as the skeleton of a webpage.
- Defines elements like headings, paragraphs, buttons, forms, and containers.
Note: You do not need to include <html>, <head>, or <body> tags. This snippet is intended to be used directly in the HTML editor.
- CSS (Cascading Style Sheets)
- Purpose: Style and layout of the HTML elements.
- Think of it as the clothes and design of the webpage.
- Defines colors, fonts, positioning, responsiveness, and animations.
- JavaScript (JS)
- Purpose: Adds interactivity and logic.
- Think of it as the brain of the webpage.
- Handles events (clicks, input), updates the page without refreshing, validates forms, and communicates with servers (APIs).
Note:
-
- Variables defined in the Variables section are accessible here via the data
Example:
data.sales
data.country - Do not create a global variable named data — it is reserved for these variables.
- To handle chart point clicks and send them to the dashboard, use the clickPoint function:
Example: clickPoint({ colName: [value] })
- Variables defined in the Variables section are accessible here via the data

The Preview function displays a live, real-time view of how the chart or dashboard will appear to users, allowing for visual validation and adjustments before finalizing.
The Logs feature, on the other hand, provides detailed technical insights into the background processes, including any errors, which help troubleshoot and ensure the chart functions correctly.
Let’s take an example of Healthcare Data
Drag and drop the required variable into the column field, then add the HTML, CSS, and JavaScript code as needed to create the chart according to the user’s requirements.