NetSuite using token based authentication
- Click Self Service.
- Click Connect.

- Search NetSuite.
- Click NetSuite.

- Enter details
- Click Test Connection.

- Upon successful connection, click Next.

- Click the check box(es) to Select Tables.
- Click the check box(es) to select columns.
- Click preview.
- Click Save.

-
Name the Dataset - Click OK.

Connecting to NetSuite using Token Based Authentication
If you want to use Token-based authentication, you’ll need the following information to connect NetSuite with Lumenore.- Consumer key
- Consumer secret
- Token
- Token secret
- Account ID
- Enable Token-Based Authentication
- Create Integration record
- Create a Role and assign it to a User
- Create an Access Token for the Integration record, User, and Role
- NetSuite Account ID.
Enable Token-Based Authentication
The following steps help you to enable Token-Based Authentication: Step 1: Go to your NetSuite Setup > Company > Enable Features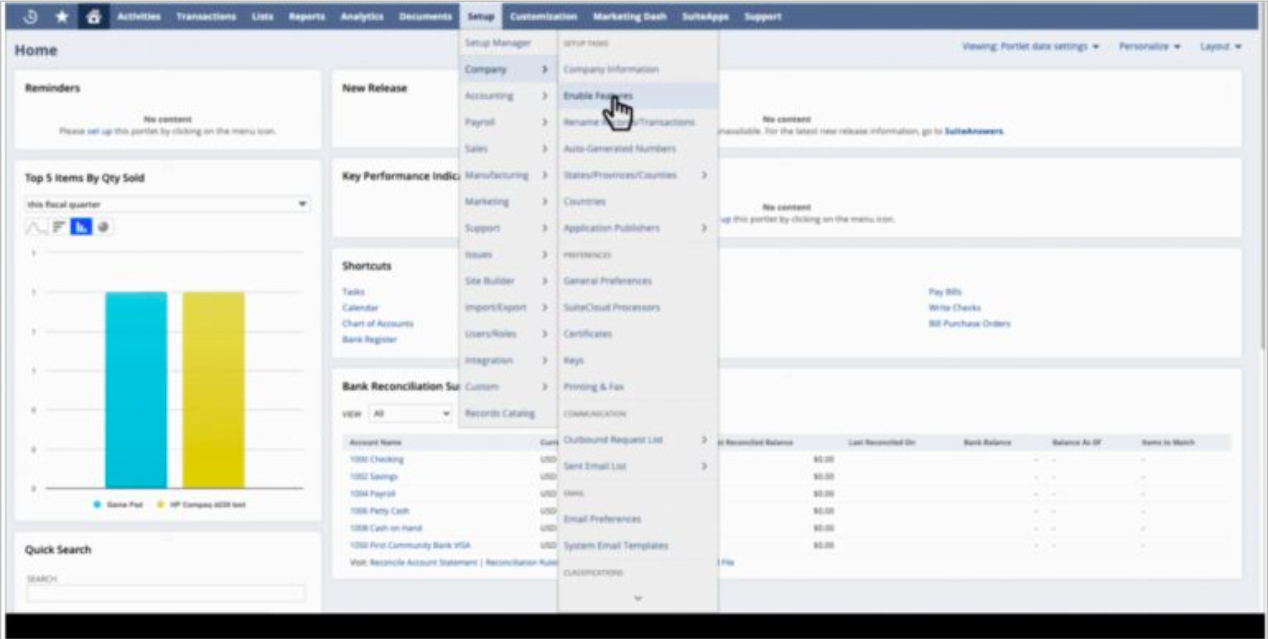 Step 2: Click on Suite Cloud
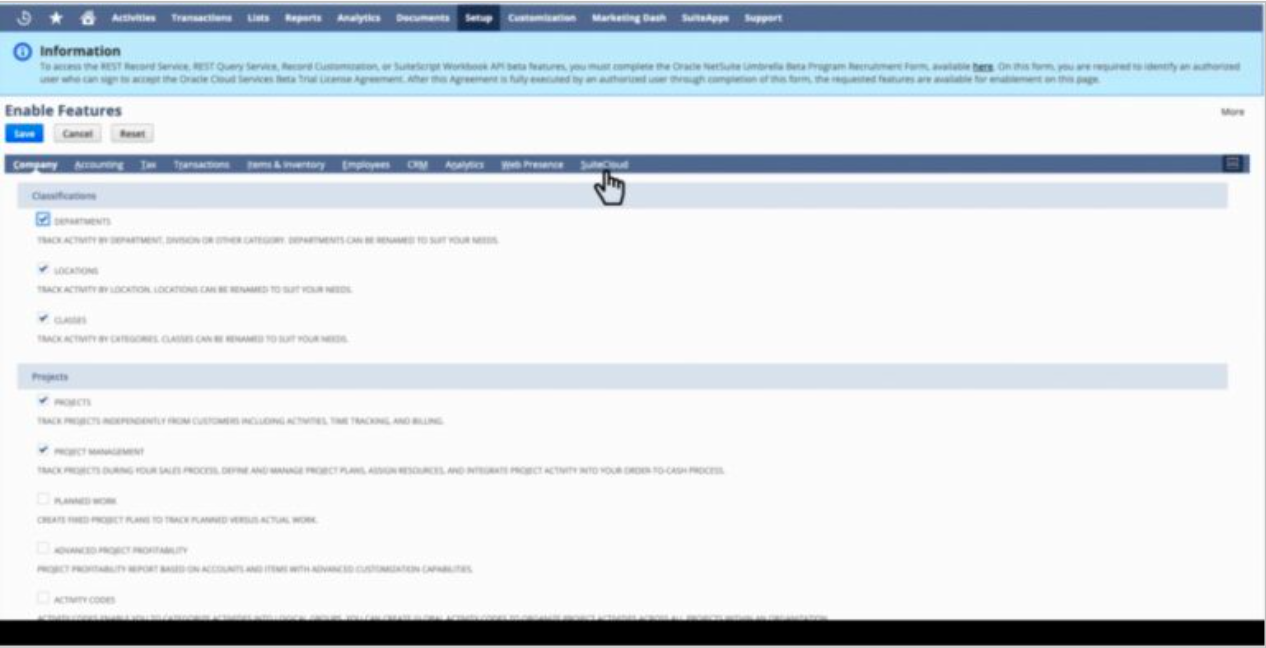 Step 3: Check Enable Token-Based Authentication in Manage Authentication.
 Step 4: Click on Save
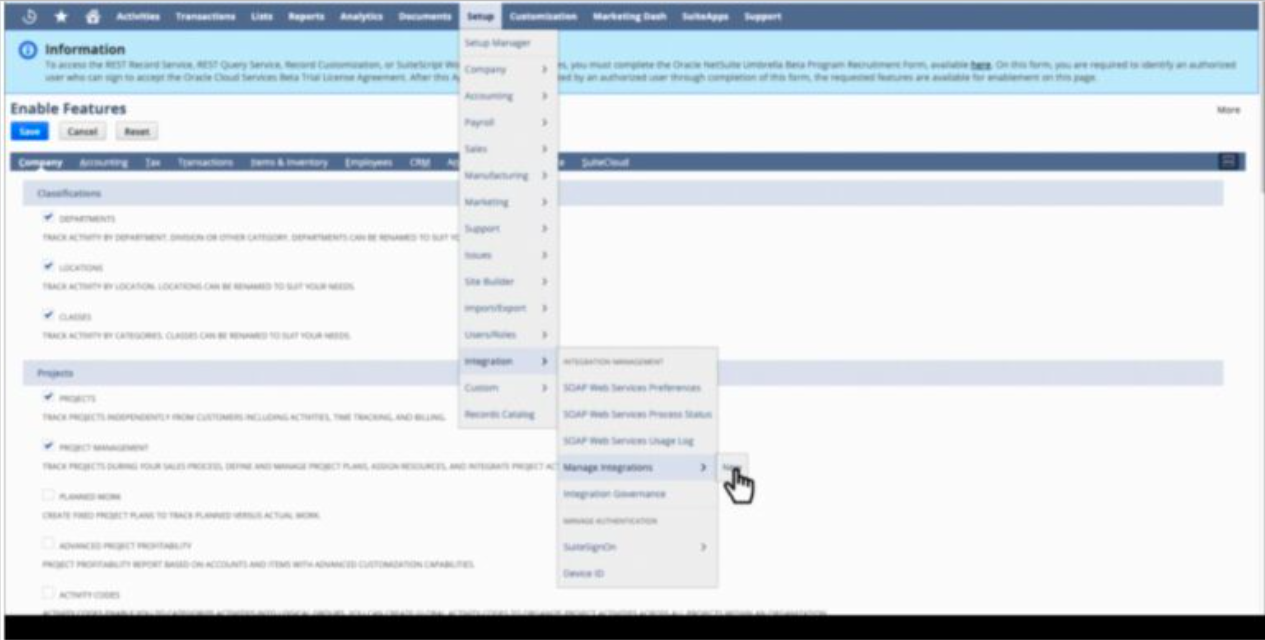
- Create an Integration Record
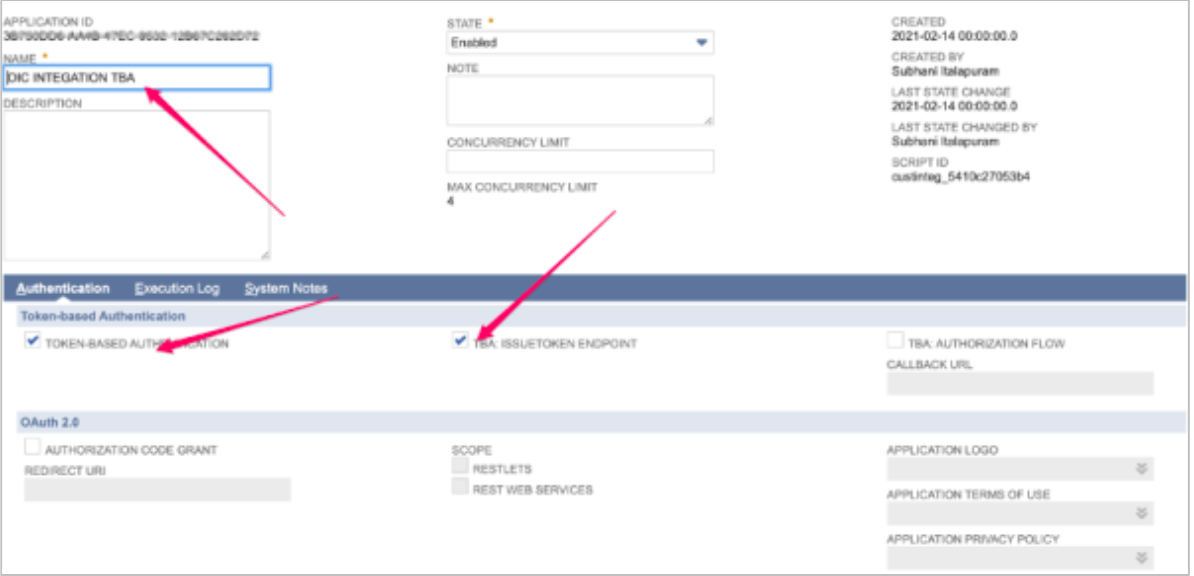 Step 3: Set the name and
- Check the Token-Based Authentication option
- uncheck the “TBA: AUTHORIZATION FLOW” and “AUTHORIZATION CODE GRANT” option
- Check the “TBA: ISSUETOKEN ENDPOINT” option.
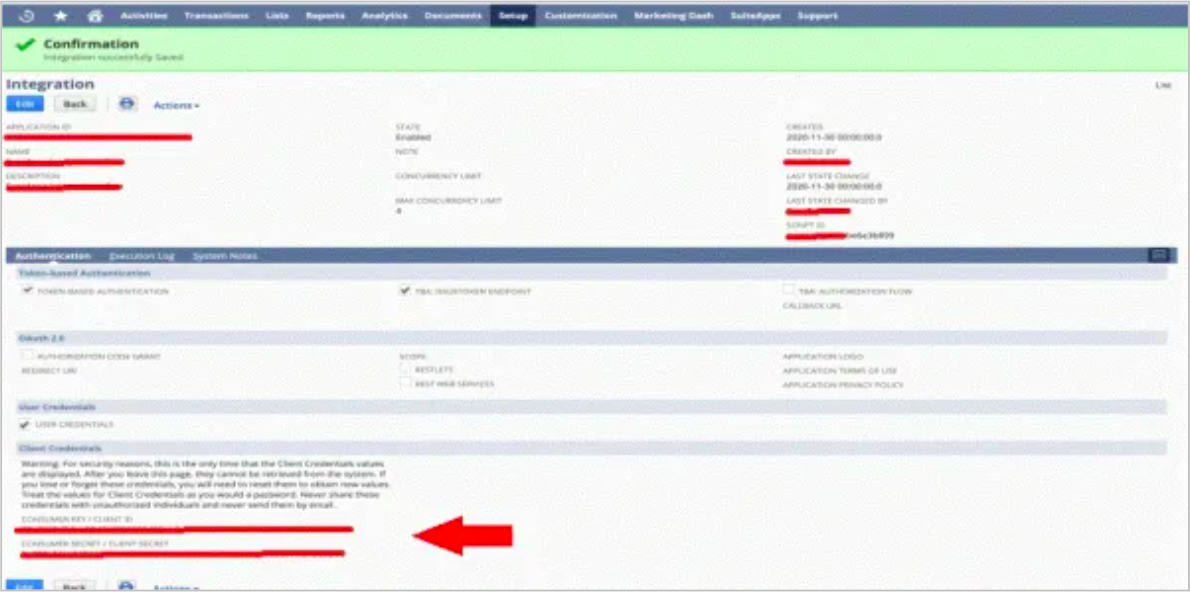 Note: Please take note that Consumer Key and Consumer Secret values are displayed only once, so please make sure you copy them before going to another page. You can also reuse the consumer key and consumer secret to link one integration (consumer key and consumer secret) to multiple access tokens.
- Create a Role and assign it to a User

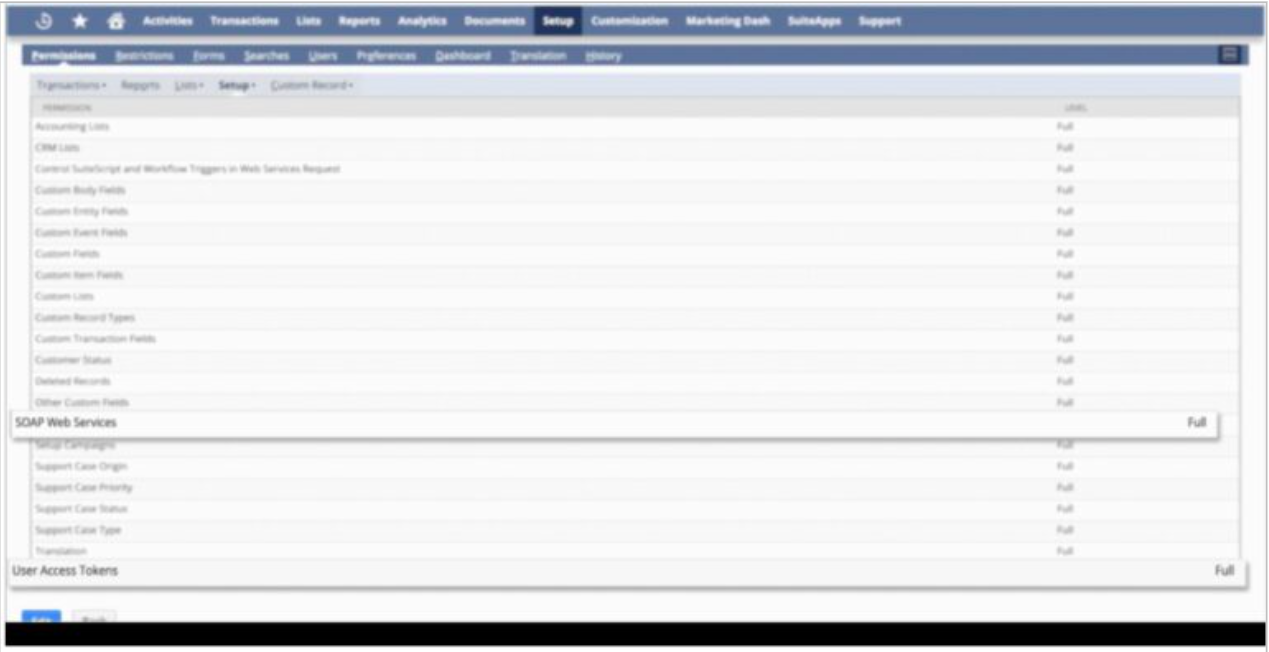 Step3: Assign the Role to the desired user that will be used for integration. Go to Lists >Employees > Employees > edit user > Access tab > Roles sub-tab.
- Create an Access Token for the Integration record, User, and Role
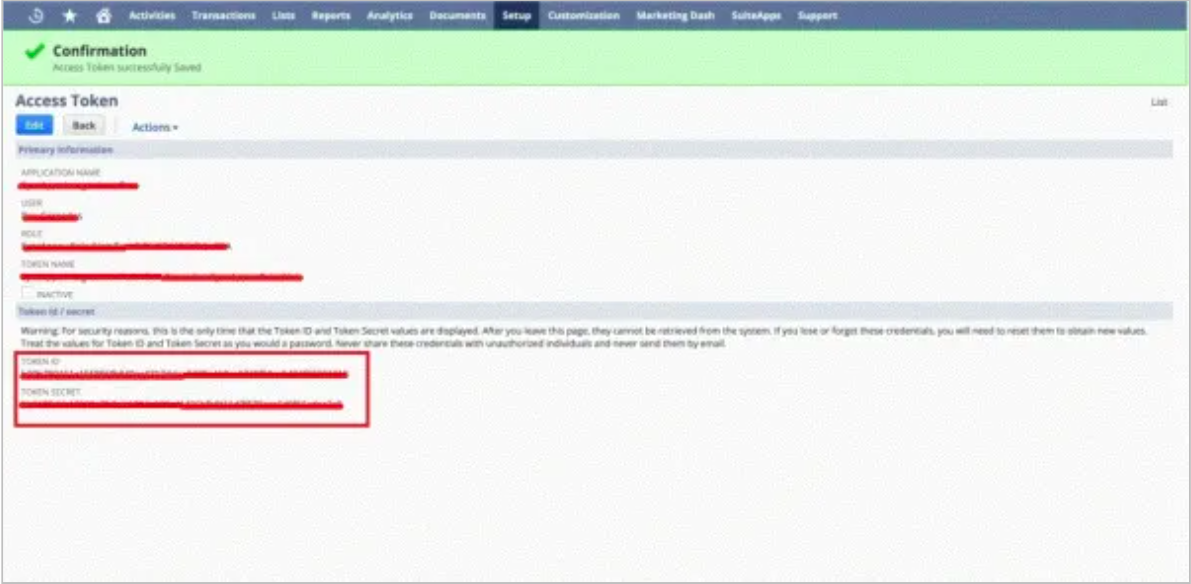 Note: Token Id and Token Secret will be displayed after tapping the save button. Please copy the Consumer Key and Consumer secret values to be used in the Set Up configuration.
Finally, you can create a connection between NetSuite and Lumenore. After the above steps are completed, you can now use the Consumer Key, Consumer Secret, Token ID, and Token Secret in one or multiple Set Up configurations.
Note: Token Id and Token Secret will be displayed after tapping the save button. Please copy the Consumer Key and Consumer secret values to be used in the Set Up configuration.
Finally, you can create a connection between NetSuite and Lumenore. After the above steps are completed, you can now use the Consumer Key, Consumer Secret, Token ID, and Token Secret in one or multiple Set Up configurations. 