Job executor
The Job Executor step facilitates the execution of a job by passing a variable with new data for each row of the source data.
How to use Job Executor?
Step 1: To begin, create a graph by connecting the “Table Input” to the “Remove Duplicates” operation, facilitating the removal of duplicate entries from the table. Name this graph as “Remove duplicates.”
Step 2: The next step involves creating a job using the graph previously established.
Step 3: Open the graph component and select the previously created graph i.e. Remove duplicates. Then press “Ok.”
Step 4: Name the job and run it.
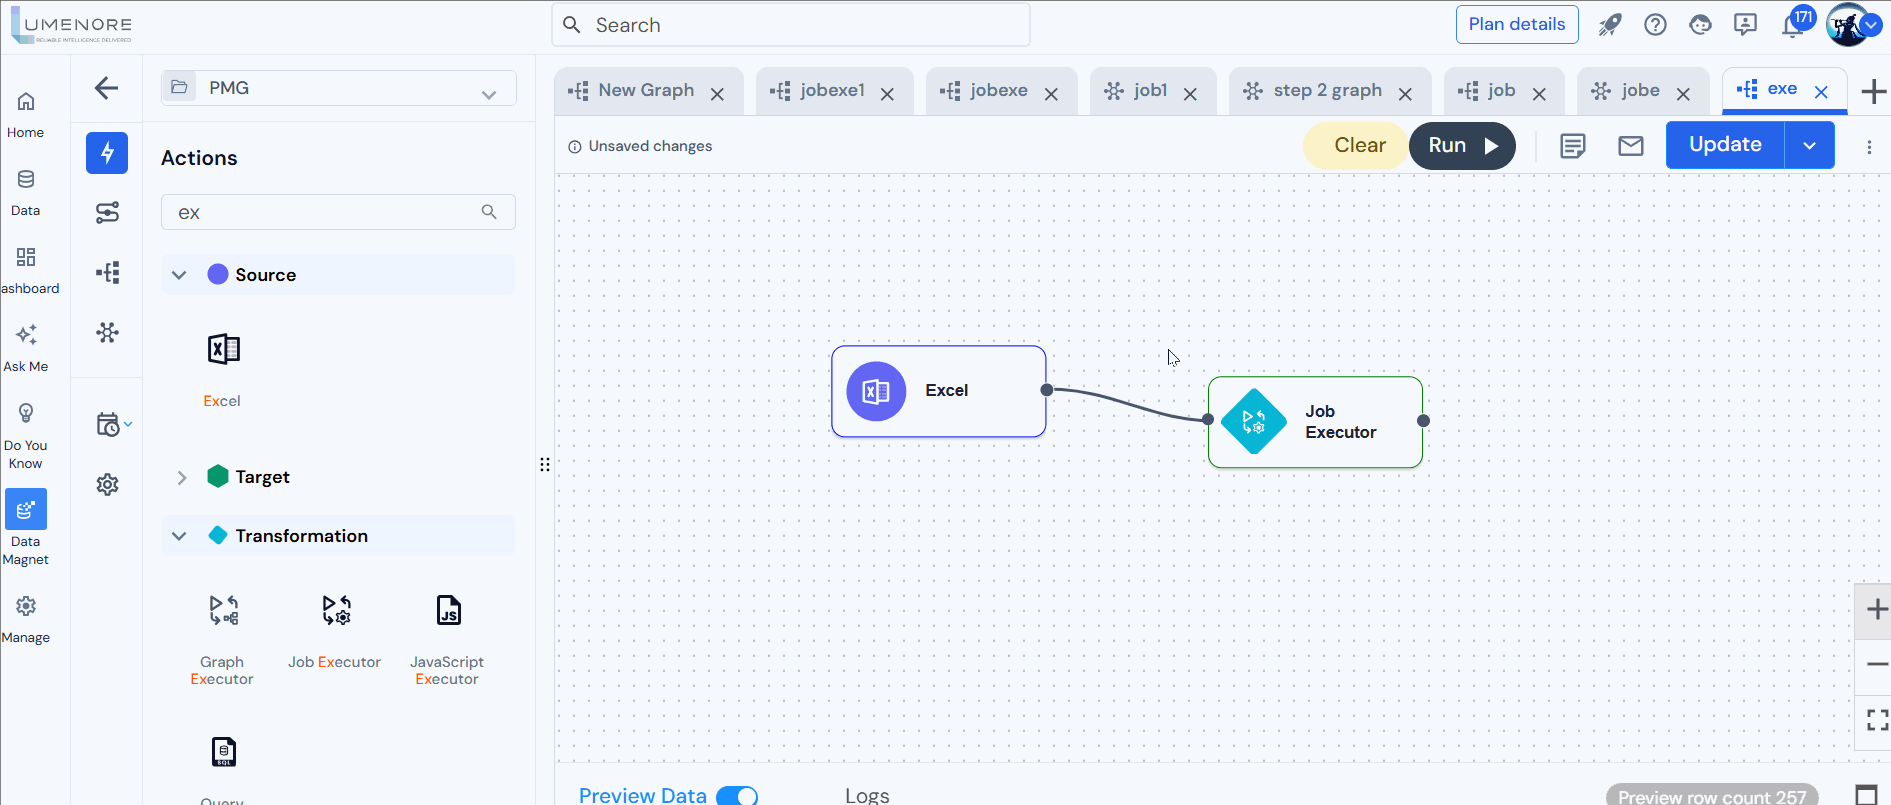
Step 5: Now, start by selecting the source to which you want to apply for the job executor.
Step 6: Open the job executer. Select the job that you want to execute. Then, create the variable by specifying its name and value according to your preferences. Finally, click “Ok.”
Step 7: Run the job executer. This function will run as many times as there are rows in the Excel file.
For example:
- Initially, we crafted a Graph named “Demo Graph” using the “Data Grid” Transformation and the “Remove Duplicates” Transformation.
- In the following step, we selected the “Graph” transformation and selected the previously created “Demo Graph” in the “Graph” column.
- Utilizing the “Demo Graph” and “Preview” features, we proceeded to create a “Job” titled “Demo Job.”

- Subsequently, we established a connection between Excel and the “Job Executor” transformation in the succeeding GIF.
- Under “Job Name,” we specified “Demo Job” and confirmed by clicking “Ok.”
- This function will execute iteratively for each row in the Excel file.

