Dynamic 365 CRM (Client)
The Dynamics 365 CRM (Client) connector enables Lumenore to securely connect to a client’s Microsoft Dynamics 365 CRM and ERP systems via bidirectional drivers. It enables seamless import and synchronization of key business data, including customer information, sales opportunities, service records, financial data, and operational workflows, into Lumenore. With this connector, organizations can create real-time dashboards, monitor performance across departments, and apply AI-driven insights on CRM and ERP data, all without complex data engineering.
Steps to connect:
Step 1: Navigate to Home > Connect Data > Select Dynamics 365 CRM (CLIENT).

Step 2: Click Create New Connection to set up a new connection or select an existing connection to proceed.

Step 3: Provide all the required details to establish the connection.

Step 4: After providing the details, click Test Connection. If the connection succeeds, a confirmation message indicates that the “Connection details are valid”; otherwise, an “Invalid connection details” message is displayed.
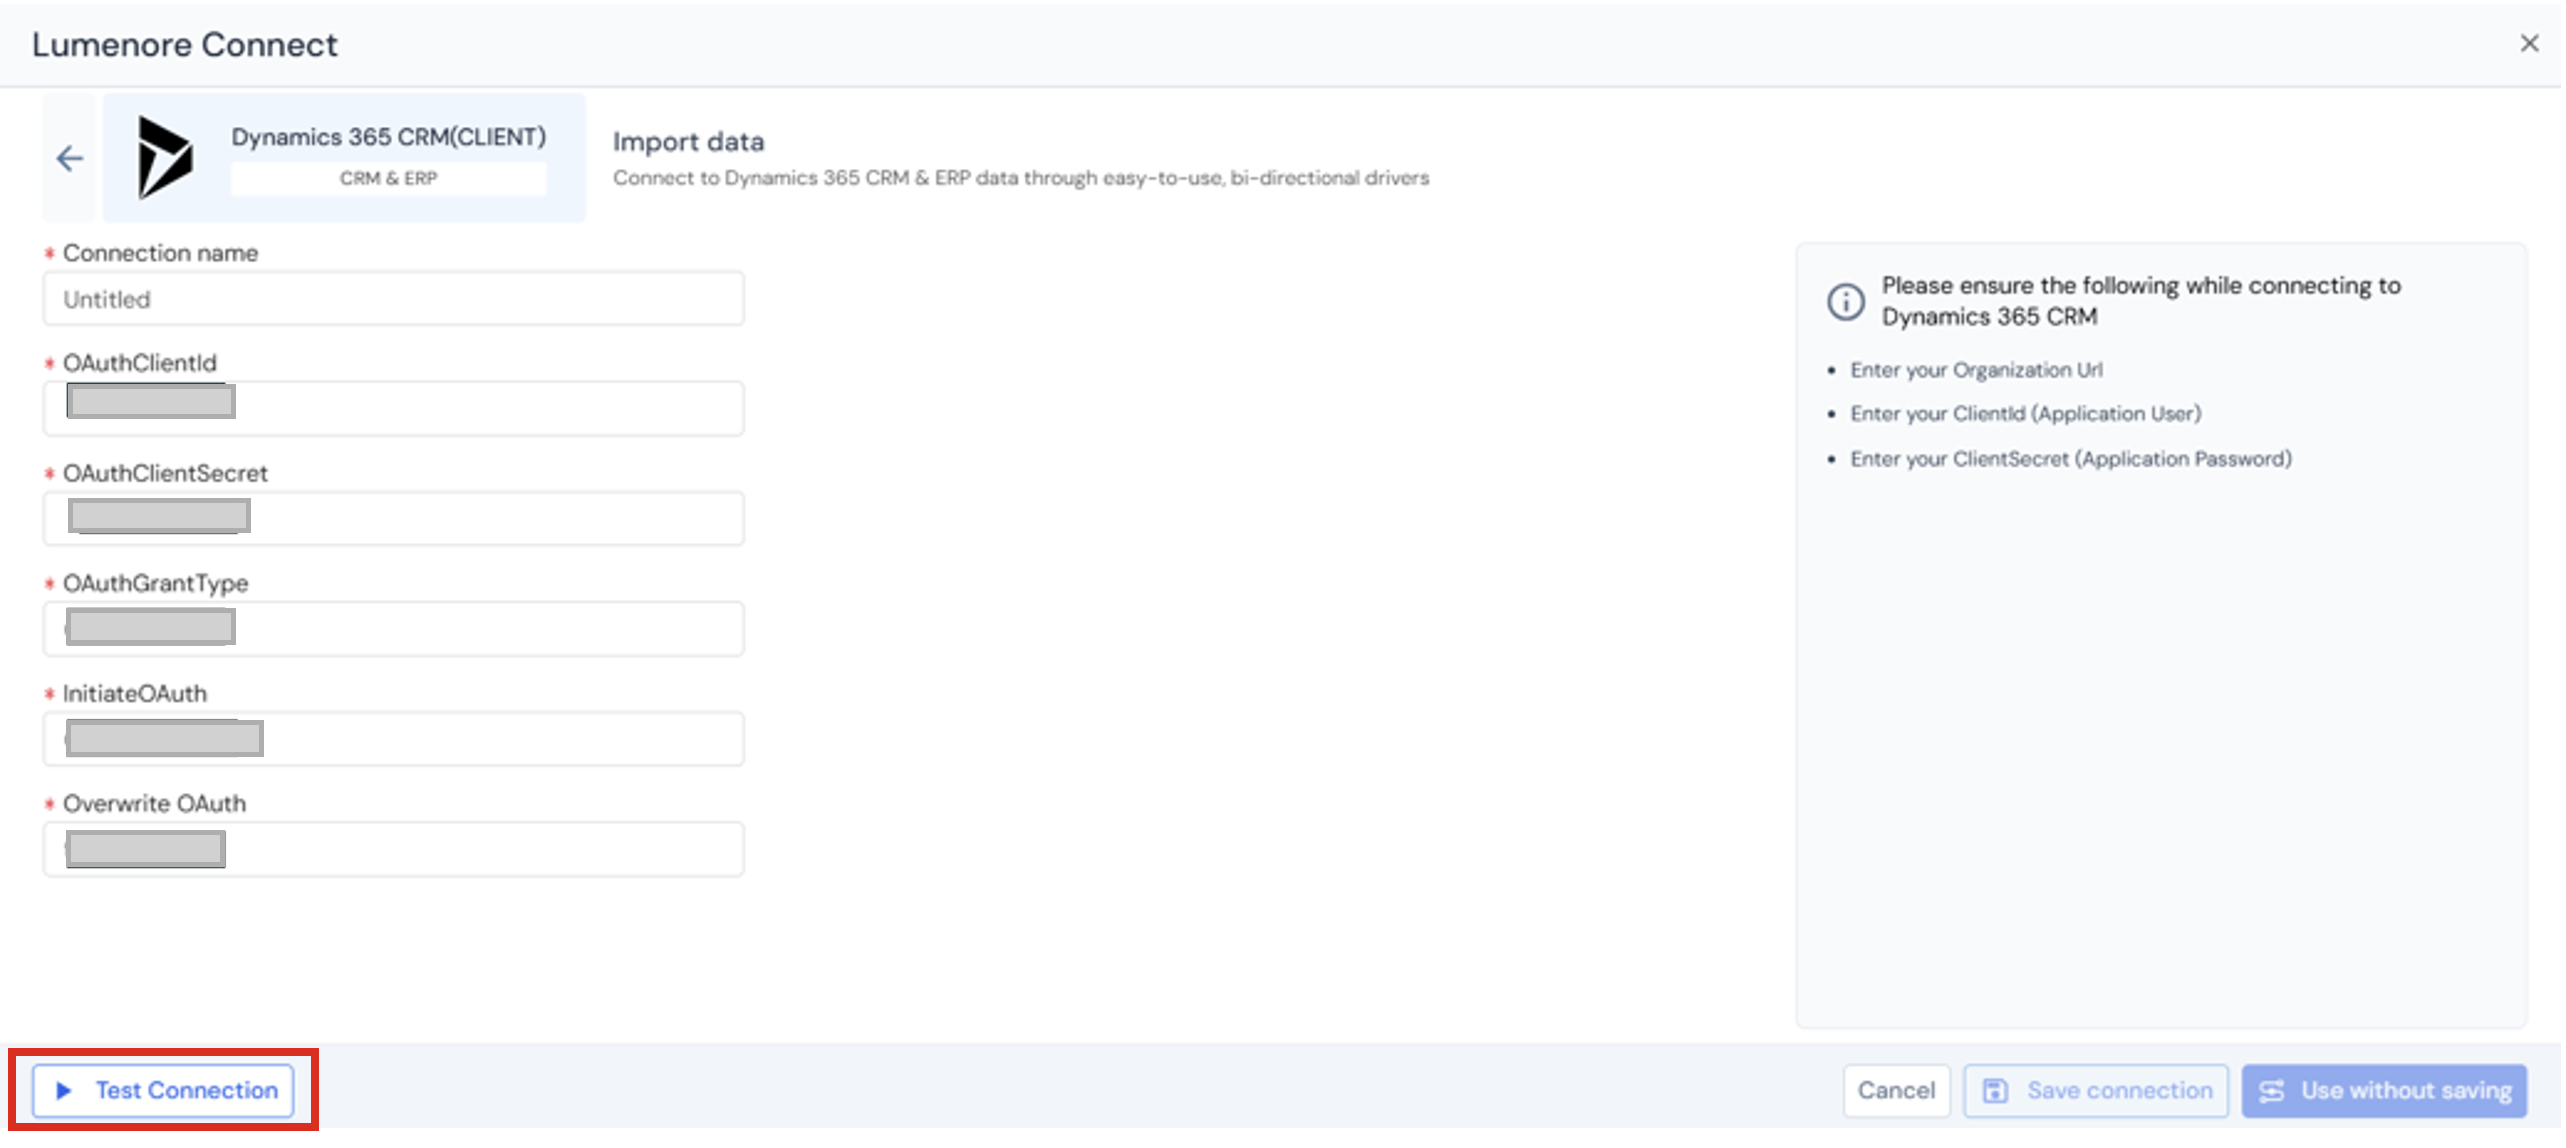
Step 5: The user can either save the connection or use it without saving.
Step 6: Once saved, the connection is added to the existing connections list and can be reused later.
Actions:
- When the user clicks the three dots under the Action column, the options Use This Connection, Modify, or Delete are displayed.
- Use Connection: Takes you to the next step to select a table.
- Modify: Allows you to edit the connection details.
- Delete: Removes the connection from the existing connections list.
Step 7: To use a connection from the existing connections list, select it and click Next.
Step 8: Select the table you want to export to the Lumenore database. You can also view the data by clicking the Preview tab.
The Preview tab lets you view table data, apply filters, adjust data capture, and perform transformations.
- Preview table data: Preview table data lets you quickly view a sample of records from the selected table before proceeding.
- Filter data: The Filter data section allows you to restrict the rows loaded from the selected table based on specific conditions.
- Transform data: The Transform Data tab below provides options for cleaning and enriching your data before loading it into the database.
- Change data capture (CDC): It is a technique for identifying and capturing only the data that has changed (new, updated, or deleted records) in a source system since the last data load.
Step 9: Click “Save Dataset” to complete data ingestion.
Step 10: Provide the Dataset name and description (optional). Click Ok.
Step 11: A “Dataset saved successfully” message is displayed. After this, the user can cancel and start using the dataset or create a schema by clicking the Create Schema option.
