Lumenore Data Universe
The Lumenore Data Universe connector enables users to access Lumenore’s internal, unified data layer via an easy-to-use wire protocol driver. It provides seamless access to governed, standardized, and pre-modeled datasets within the Lumenore ecosystem, eliminating the need to re-ingest or duplicate data. With this connector, users can quickly build dashboards, run advanced analytics, and apply AI-driven insights across enterprise-ready datasets while ensuring consistency, security, and data governance.
Steps to connect:
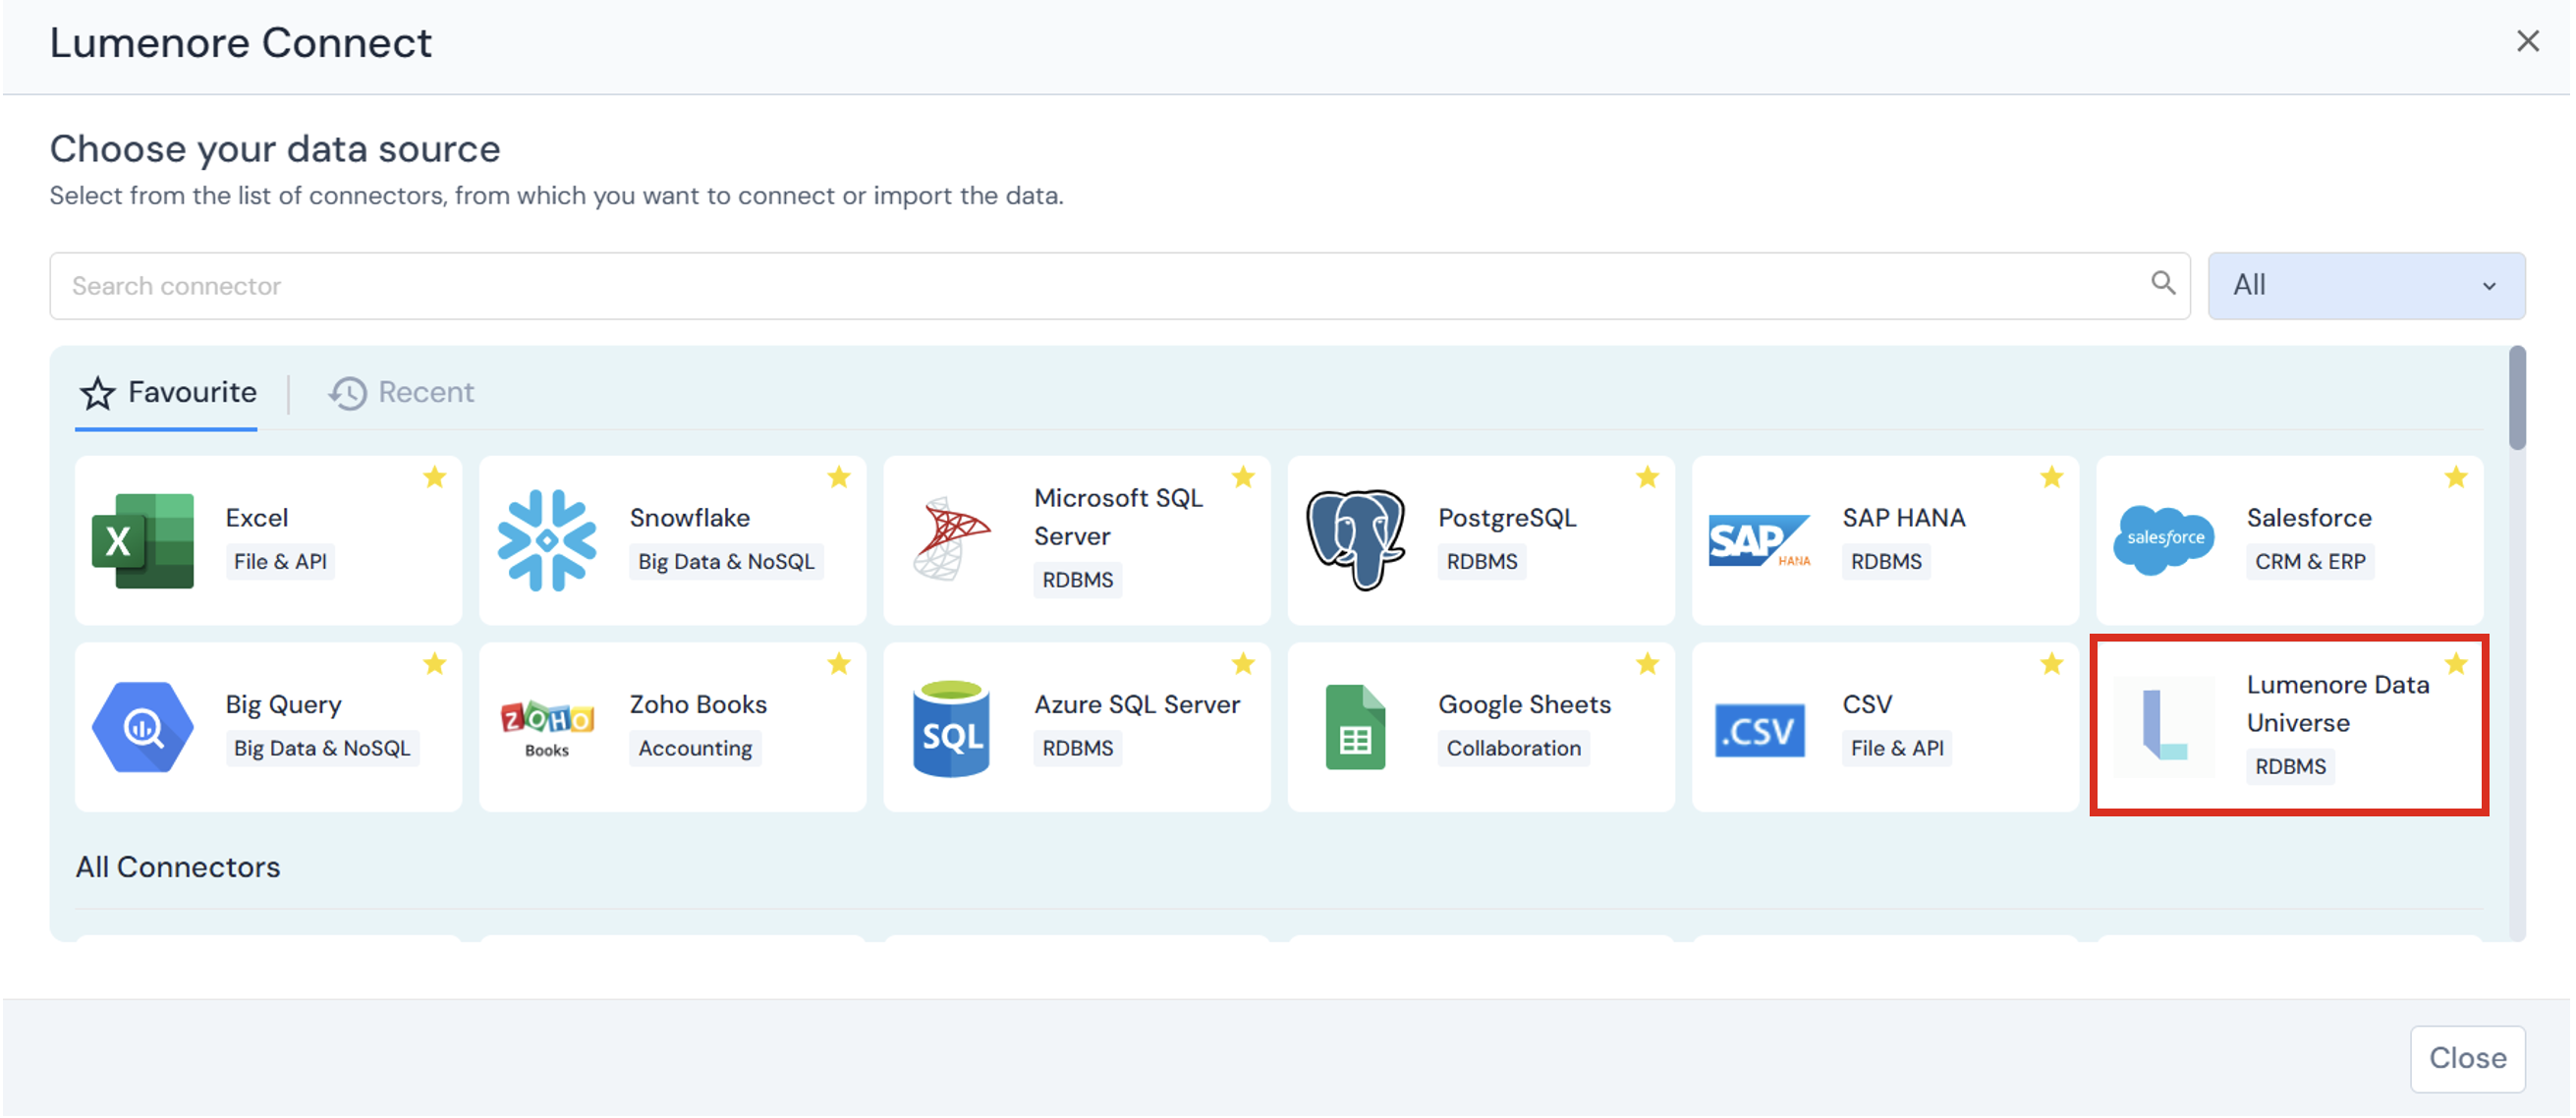
Step 1: Navigate to Home > Connect Data > Lumenore Data Universe.
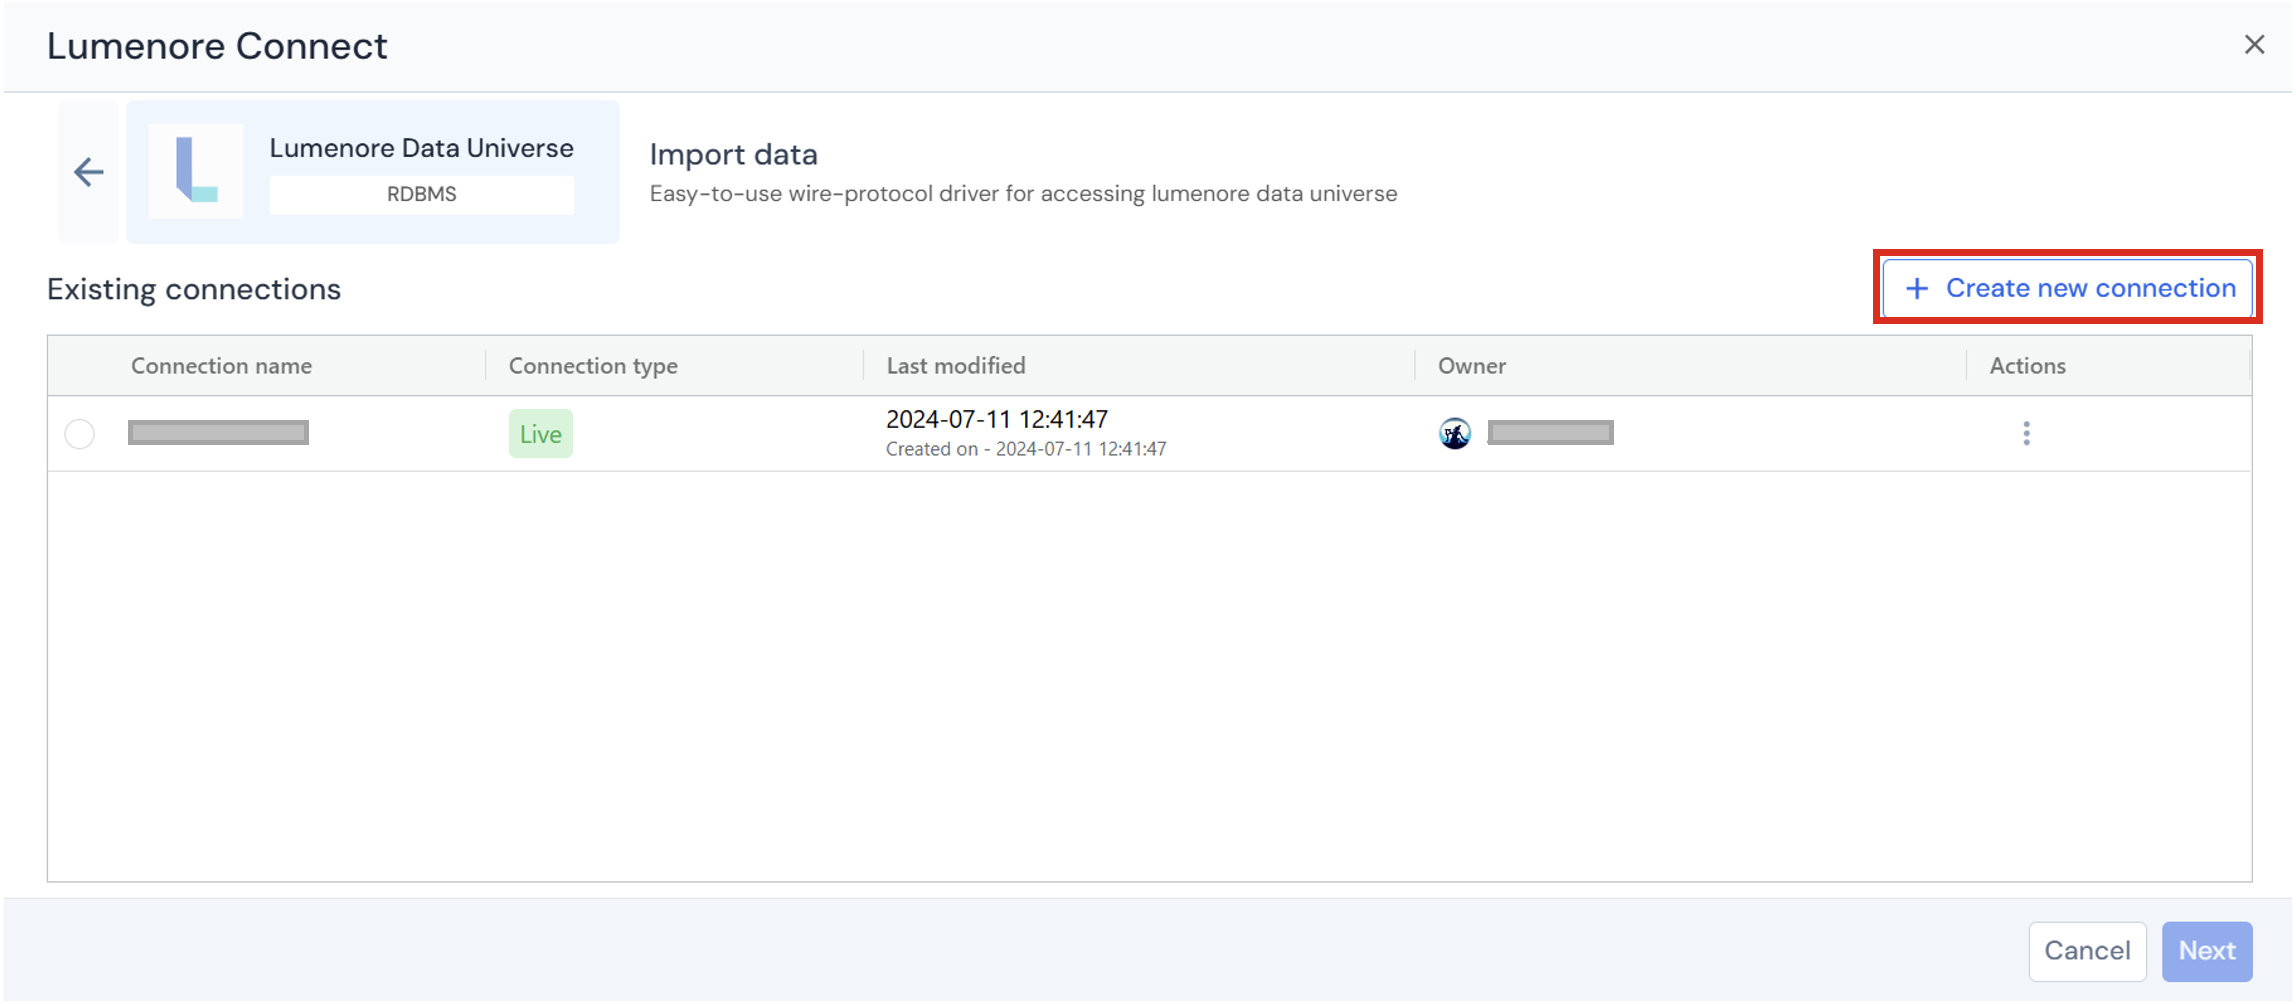
Step 2: Click Create New Connection to set up a new connection or select an existing connection to proceed.
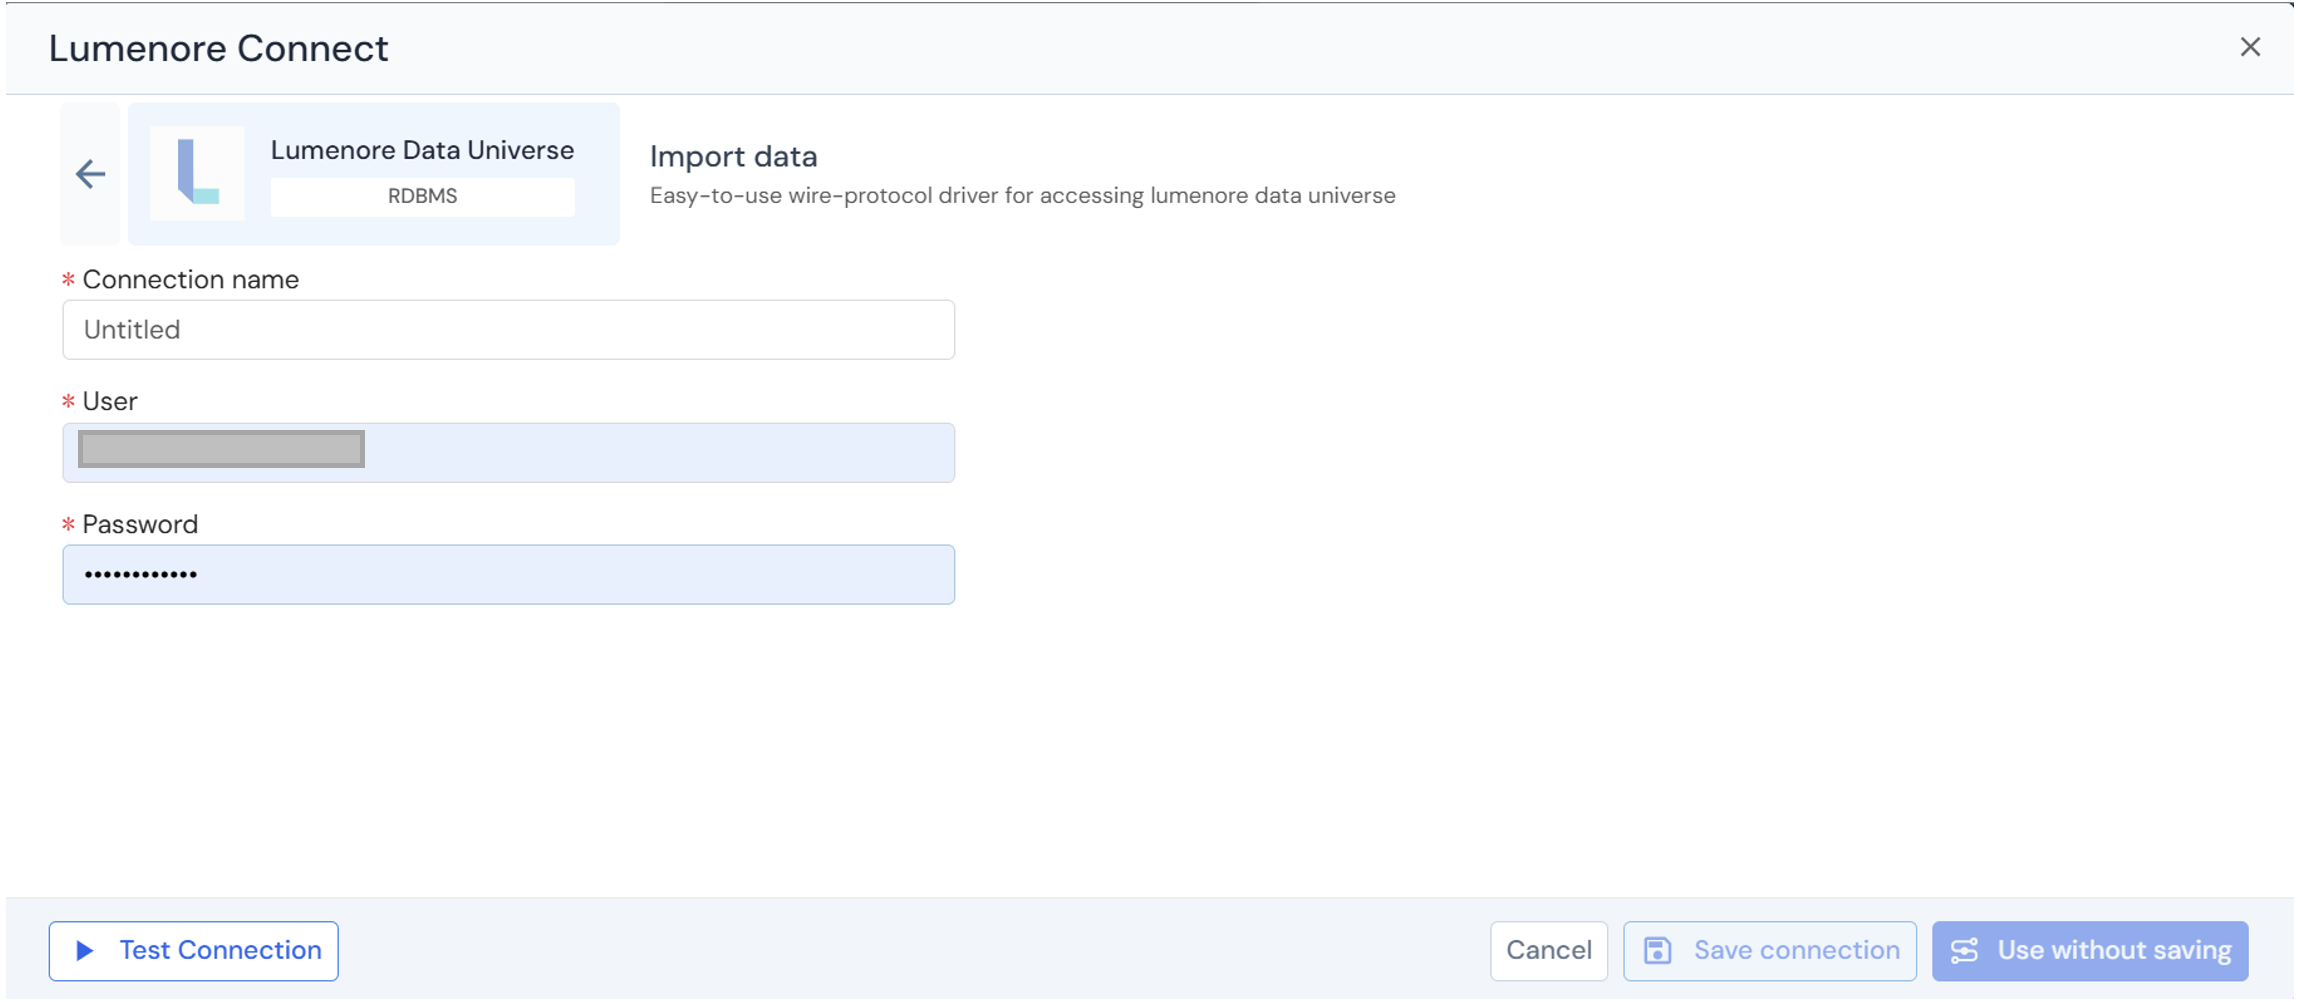
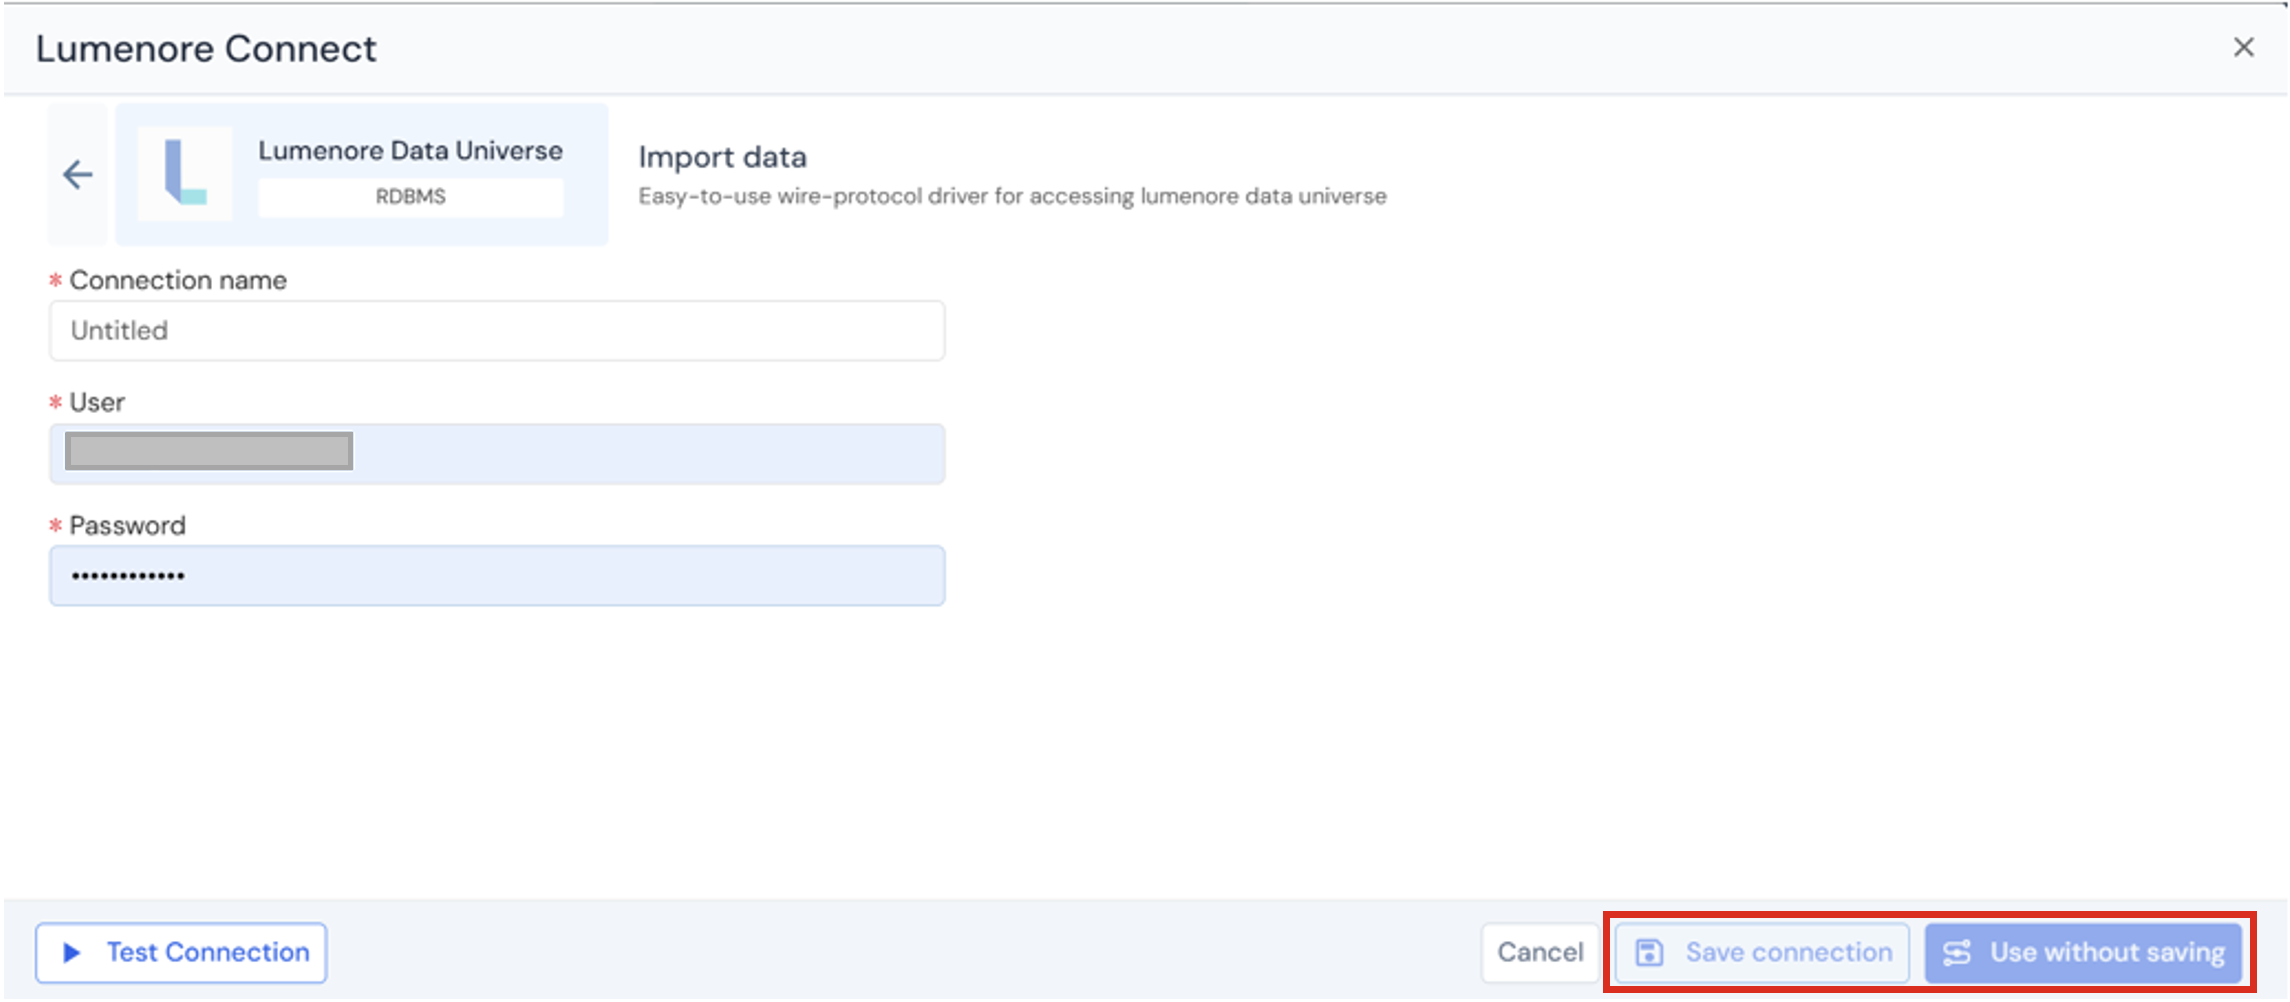
Step 3: Provide all the required details to establish the connection.
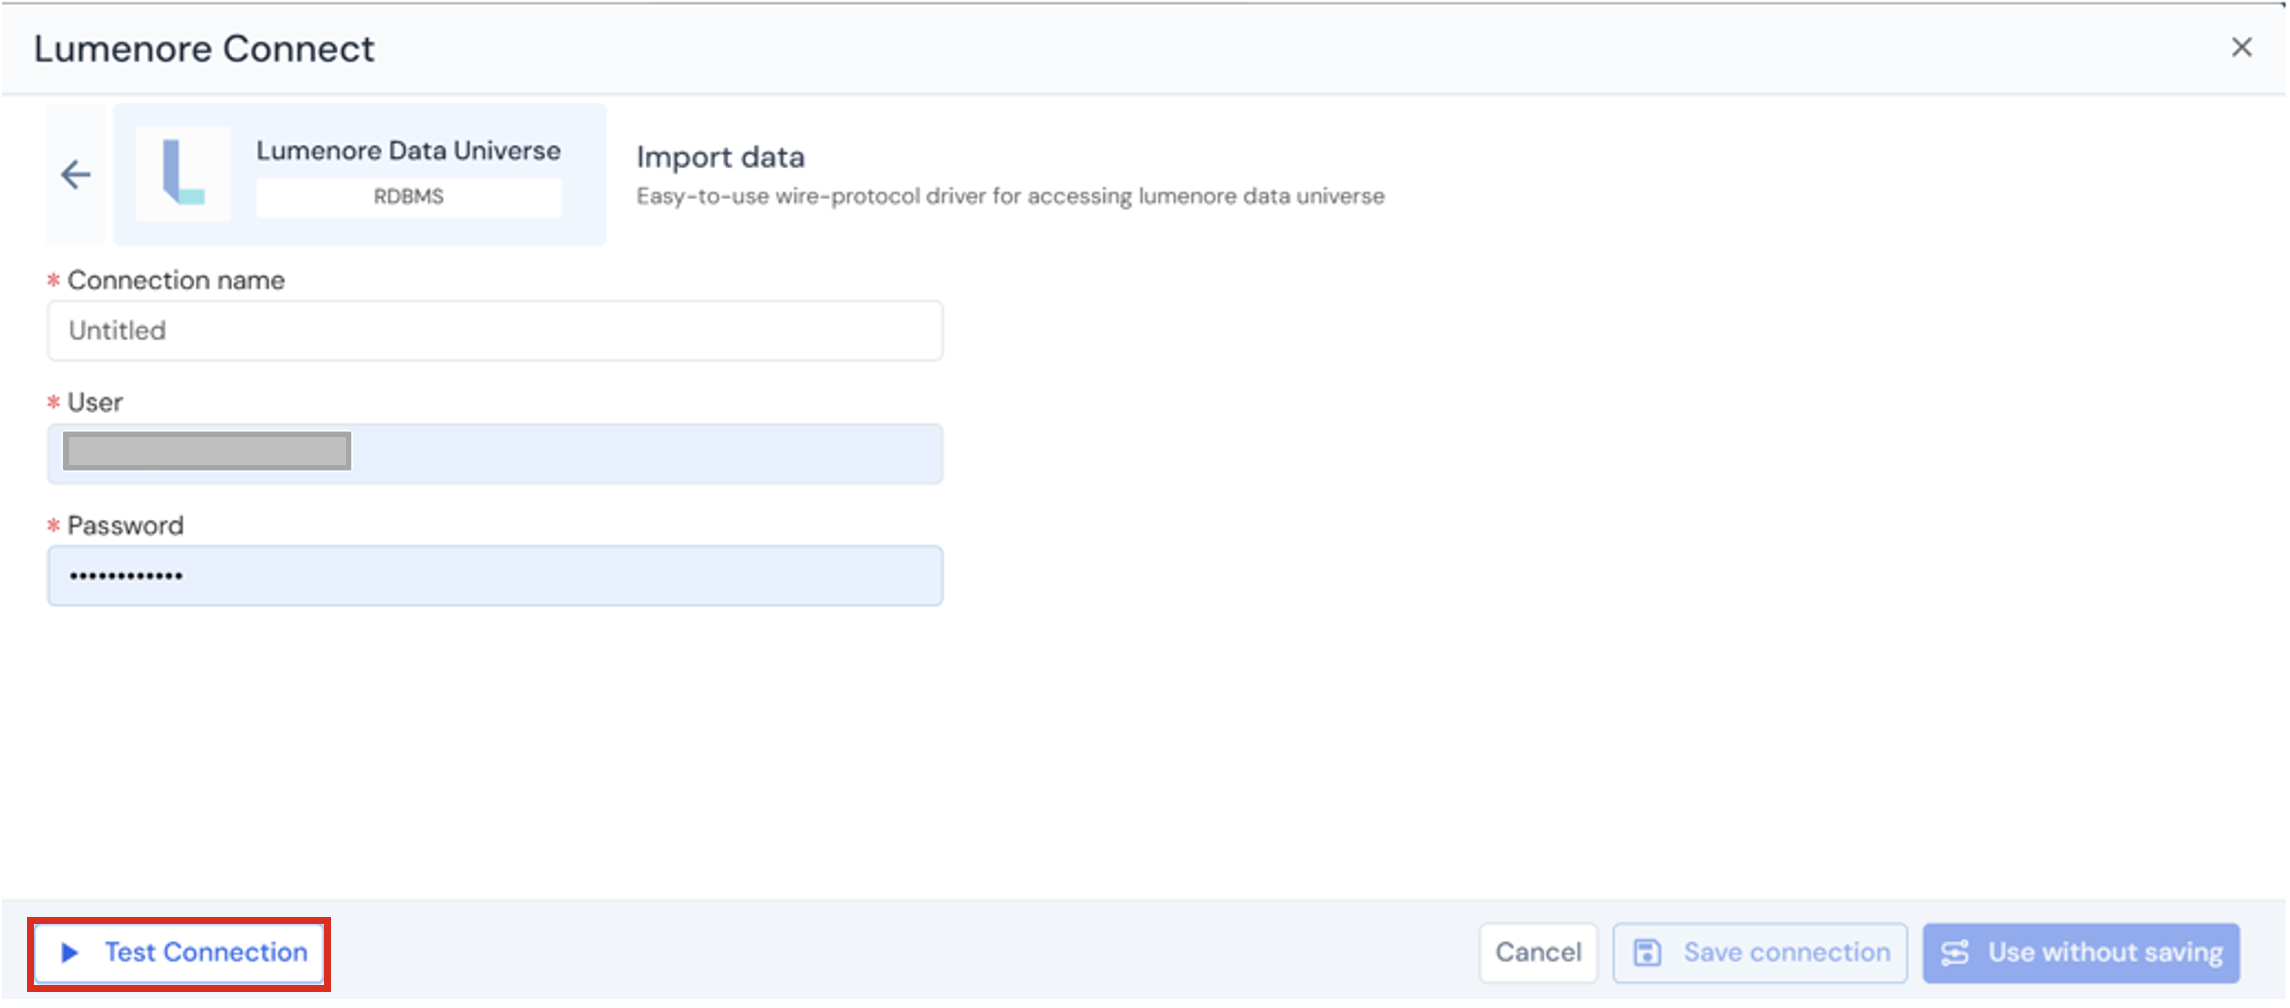
Step 4: After providing the details, click Test Connection. If the connection succeeds, a confirmation message indicates that the “Connection details are valid”; otherwise, an “Invalid connection details” message is displayed.
Step 5: The user can either save the connection or use it without saving.
Step 6: Once saved, the connection is added to the existing connections list and can be reused later.
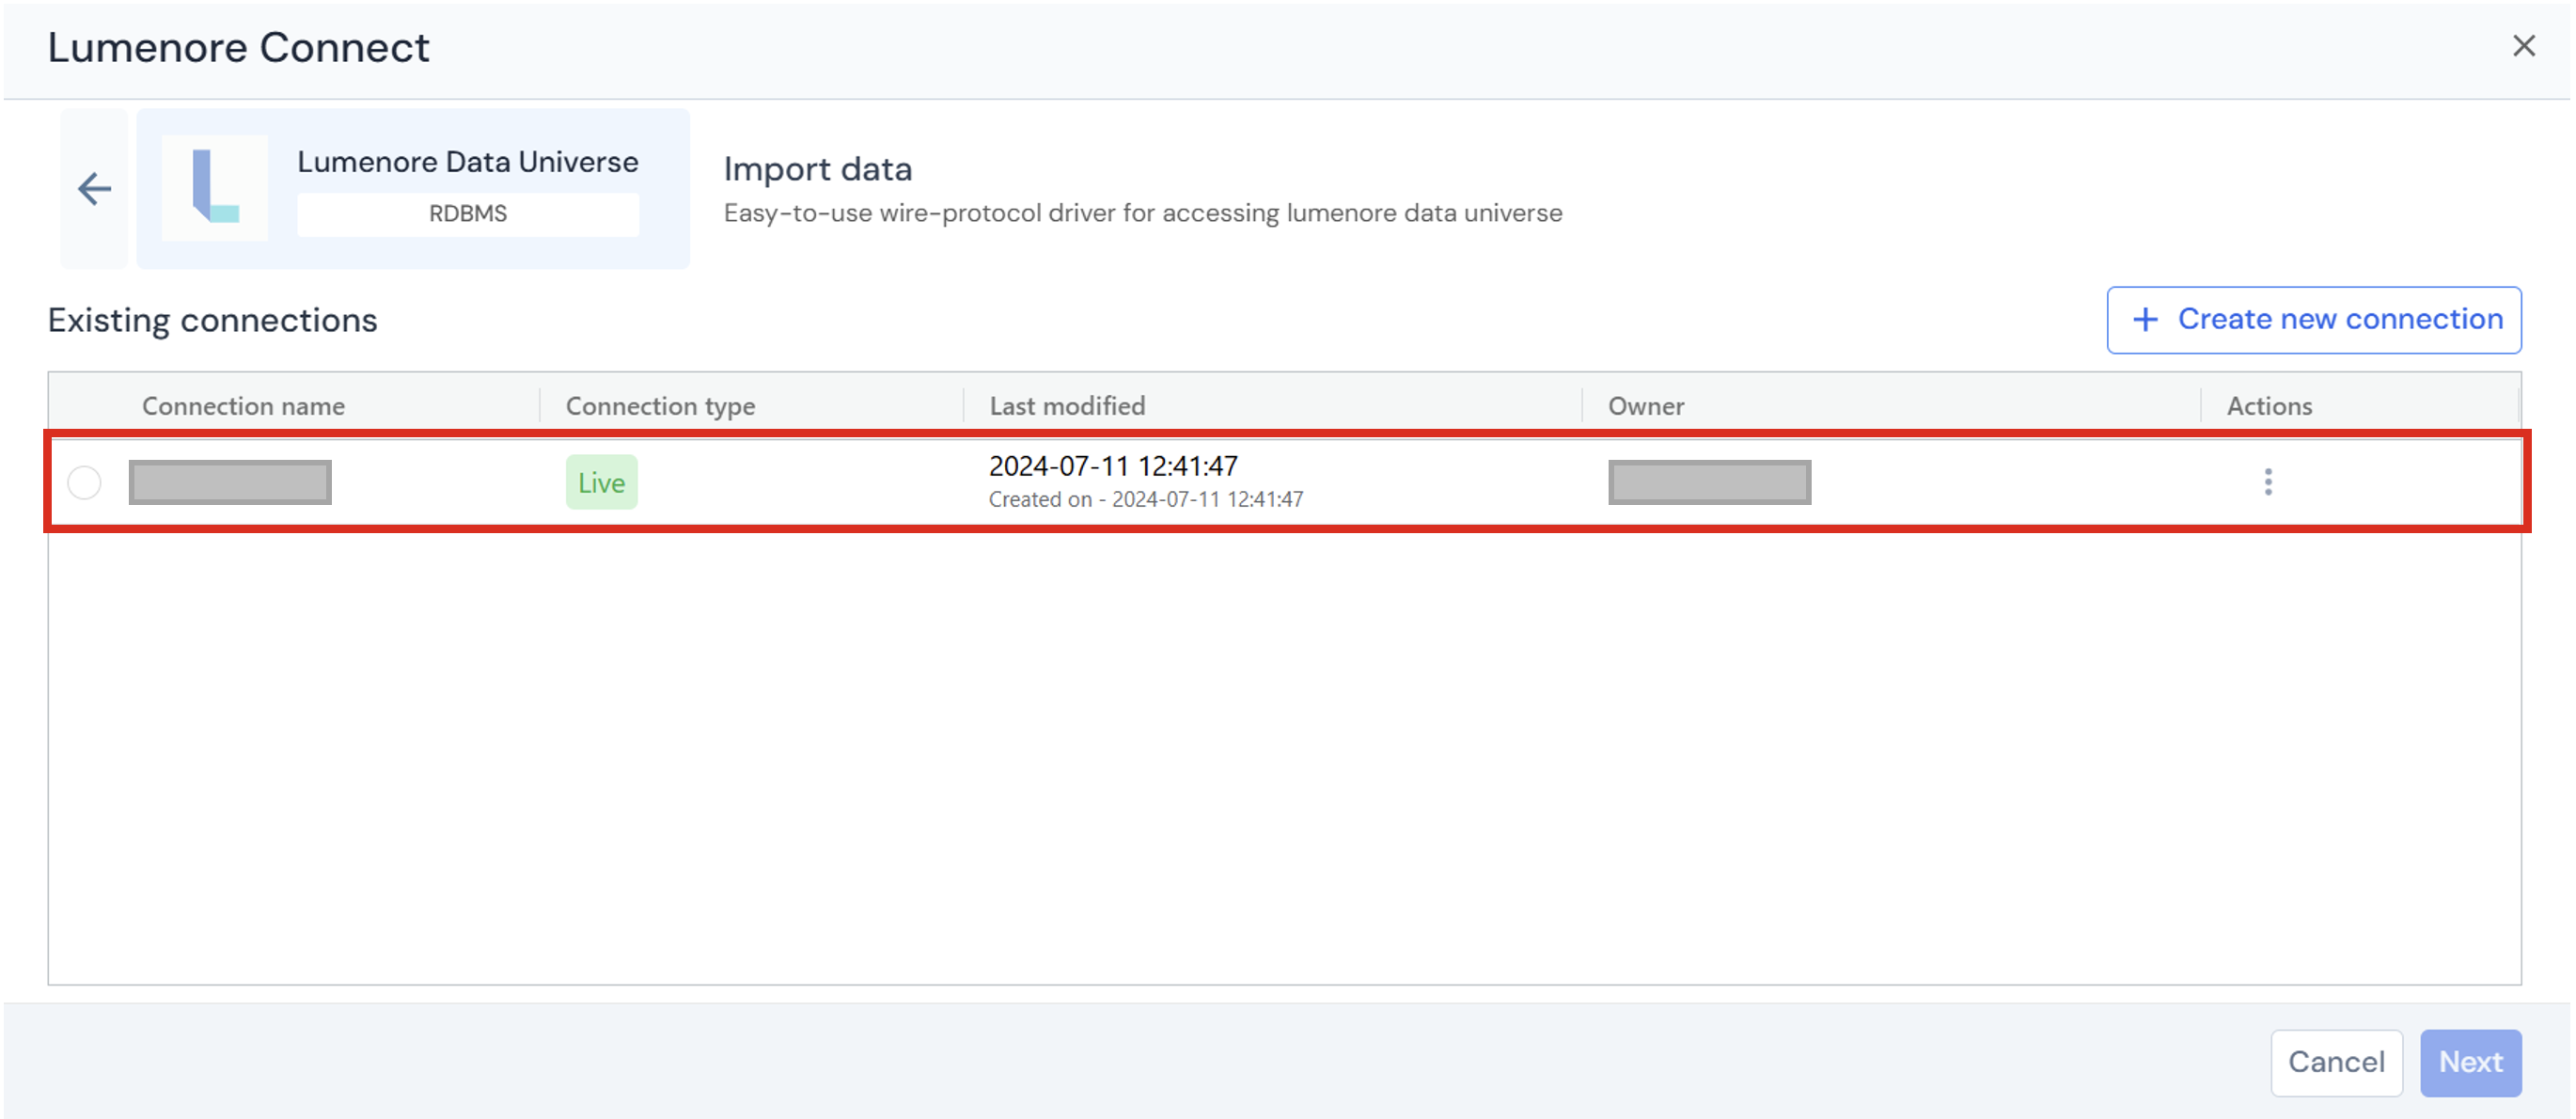
Actions:
- When the user clicks the three dots under the Action column, the options Use This Connection, Modify, or Delete are displayed.
- Use Connection: Takes you to the next step to select a table.
- Modify: Allows you to edit the connection details.
- Delete: Removes the connection from the existing connections list.
Step 7: To use a connection from the existing connections list, select it and click Next.

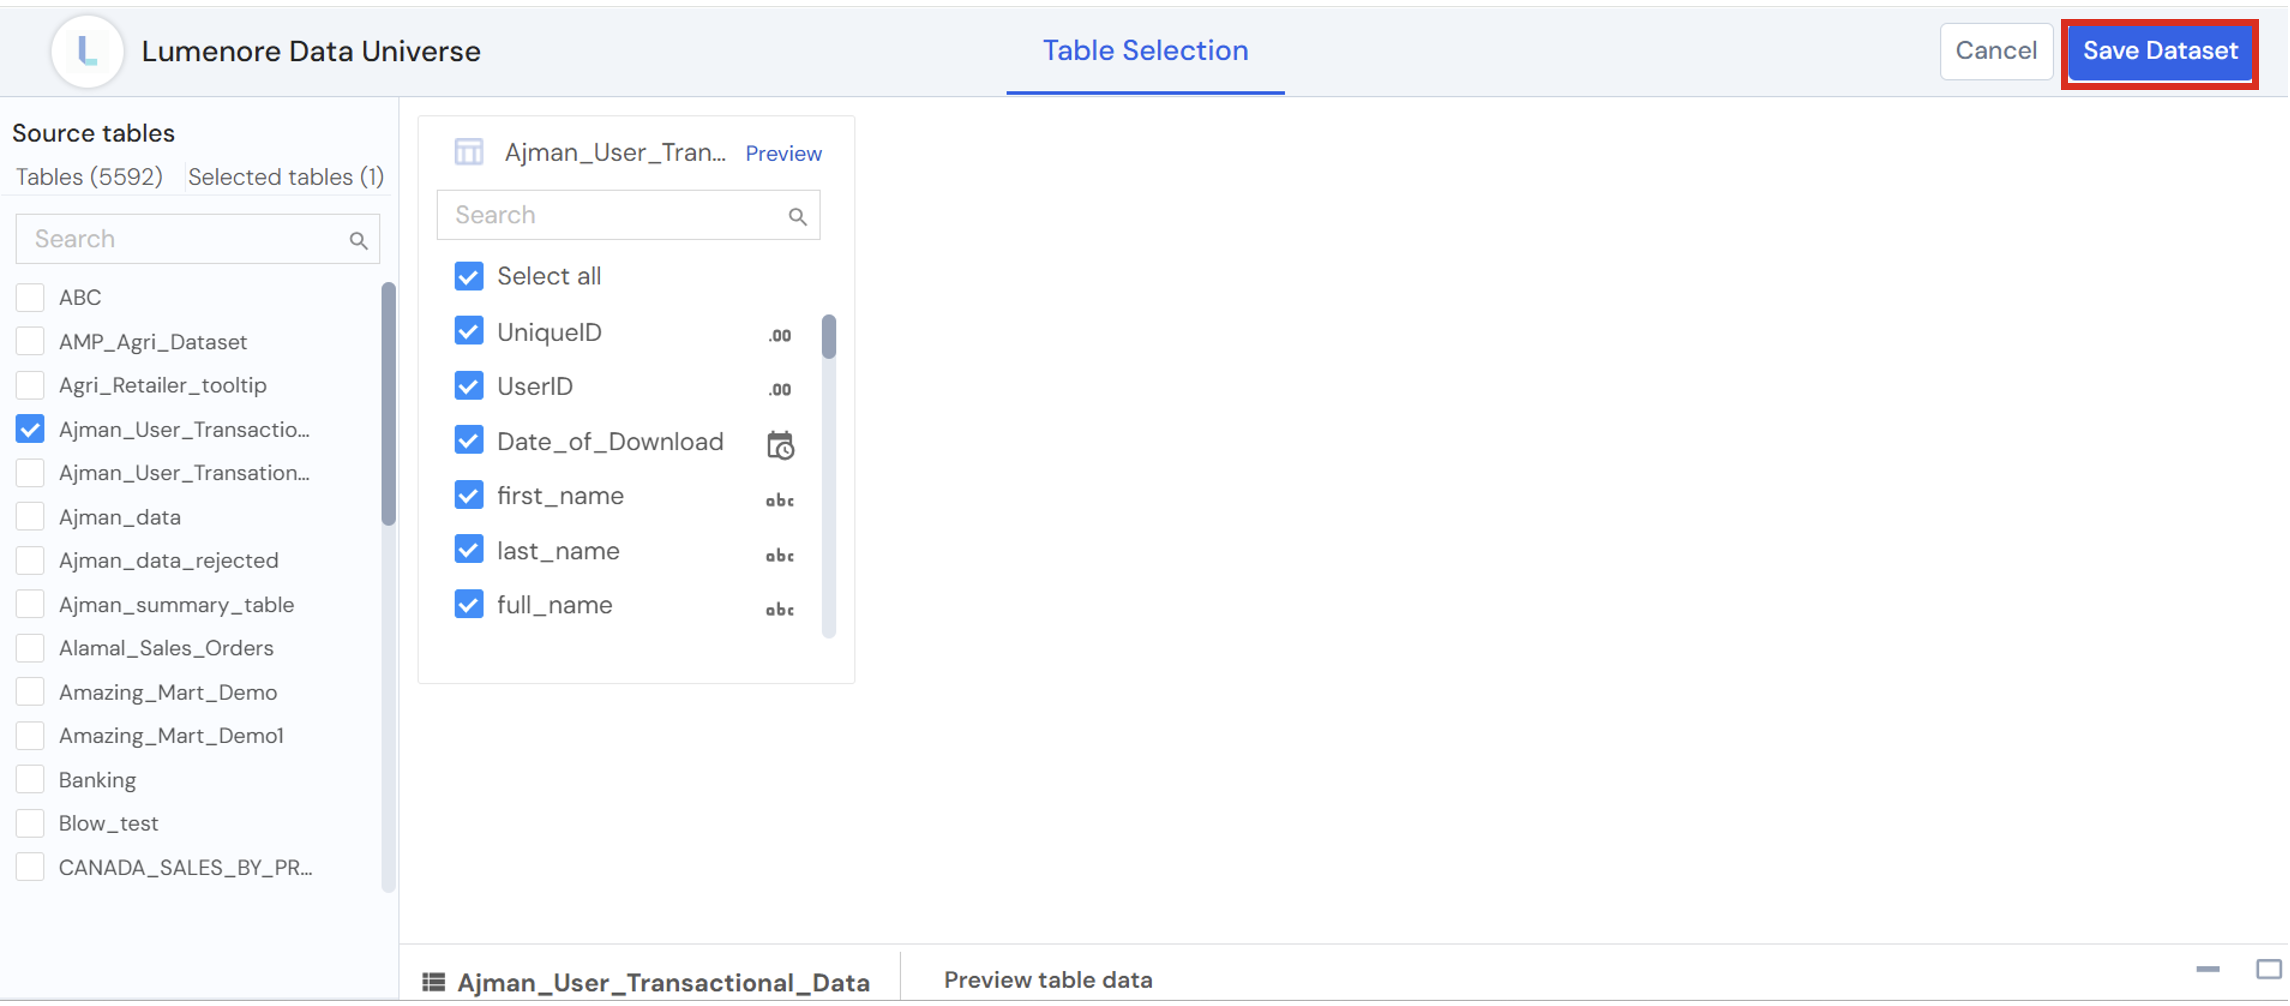
Step 8: Select the table you want to export to the Lumenore database. You can also view the data by clicking the Preview tab.
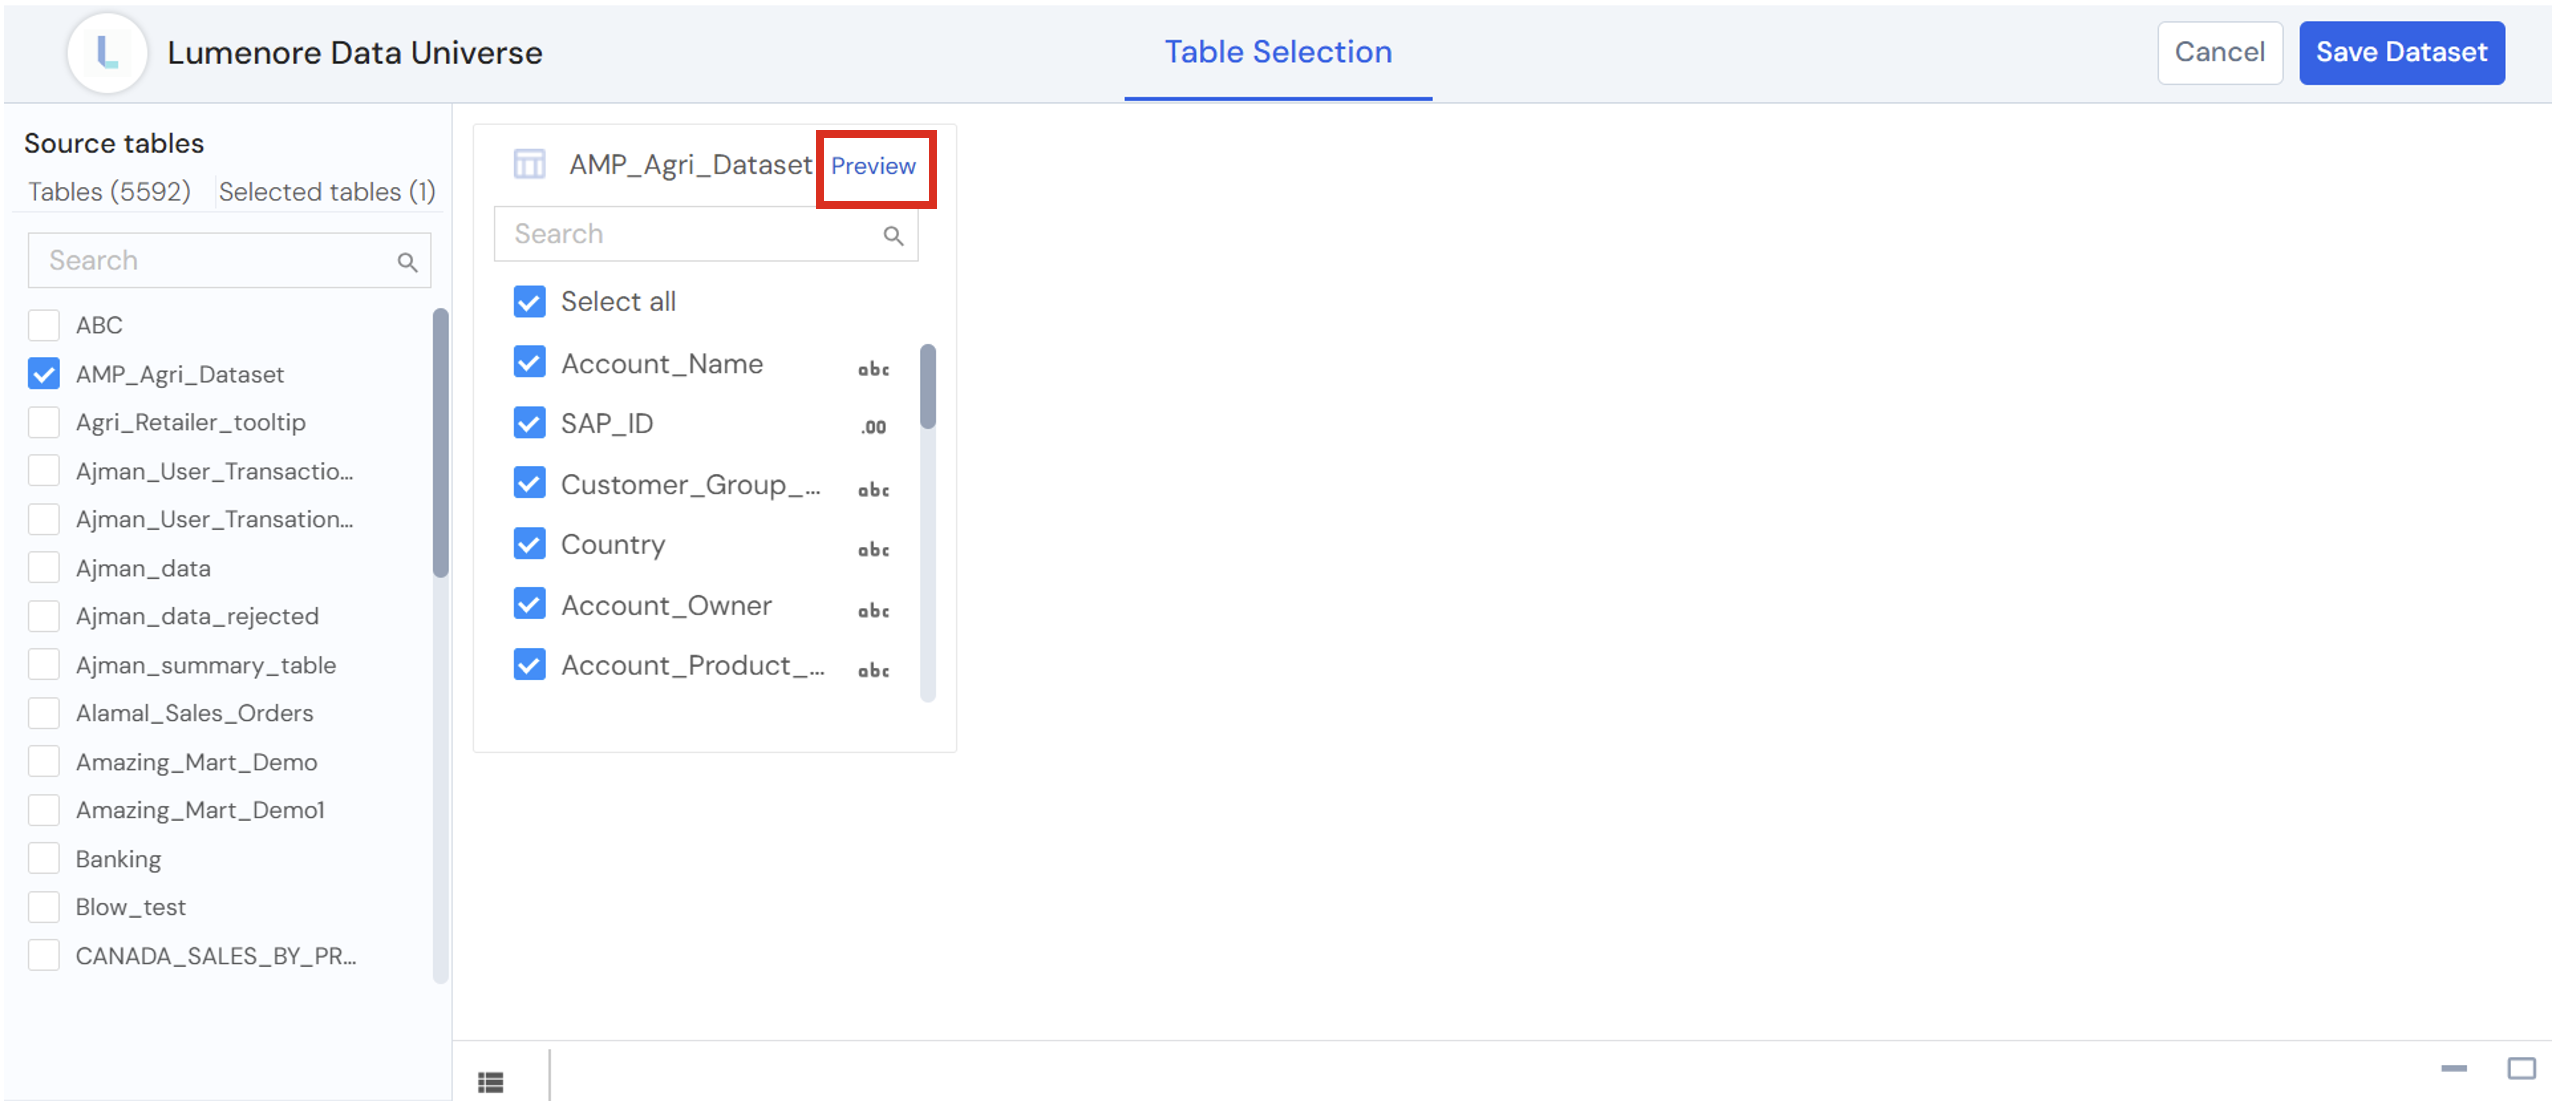
- Preview table data: Preview table data lets you quickly view a sample of records from the selected table before proceeding.
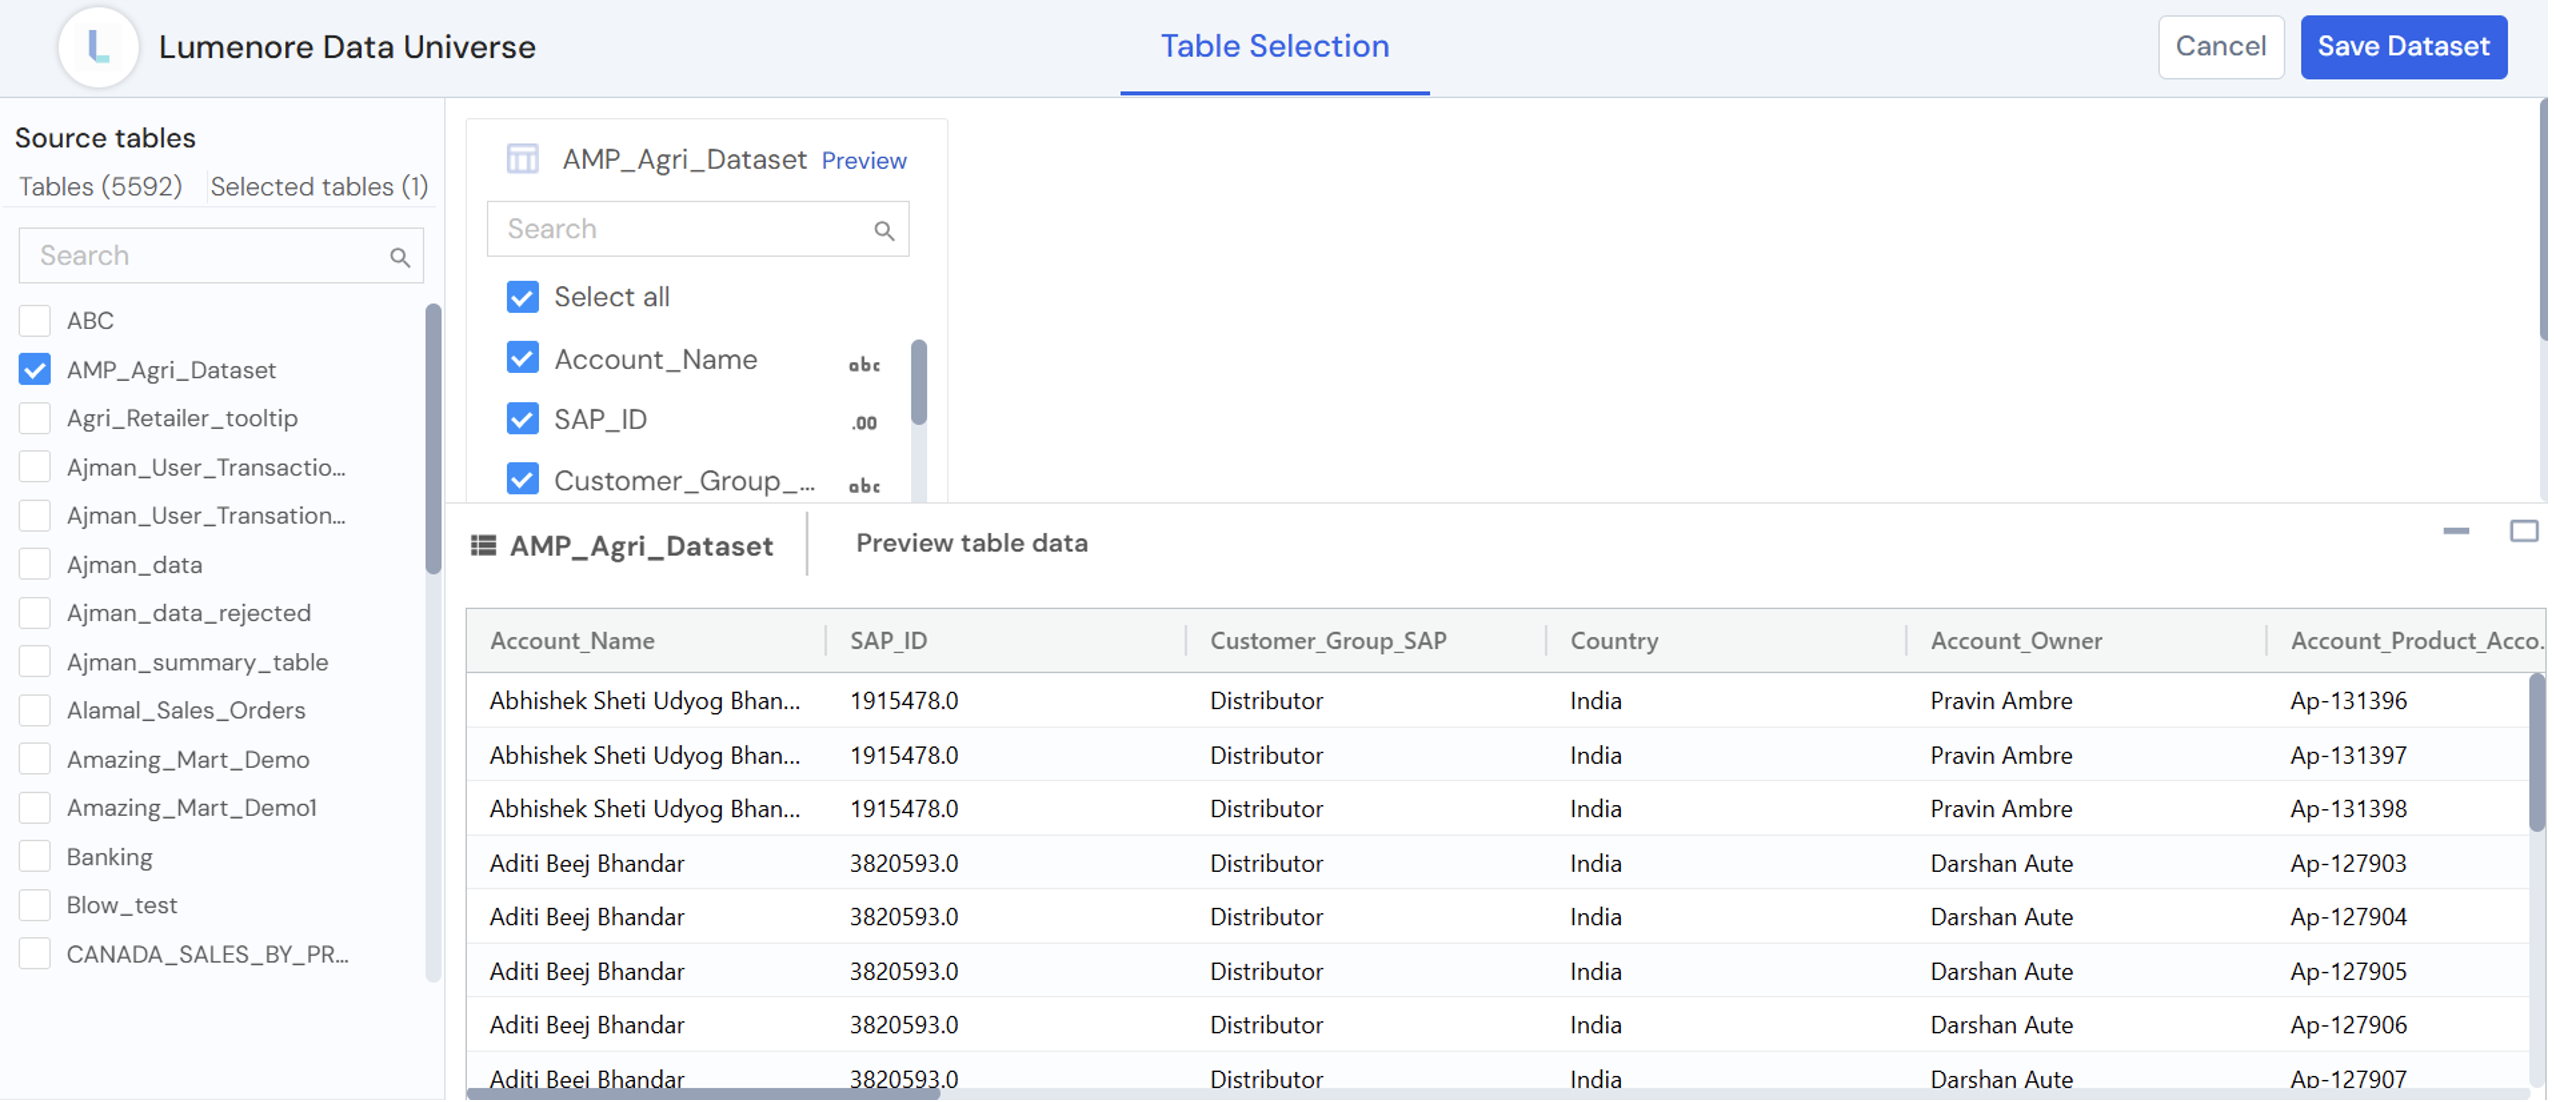
Step 9: Click “Save Dataset” to complete data ingestion.
Step 10: Provide the Dataset name and description (optional). Click Ok.

Step 11: A “Dataset saved successfully” message is displayed. After this, the user can cancel and start using the dataset or create a schema by clicking the Create Schema option.

