Dynamics 365 CRM
- Click Self Service.
- Click Connect.

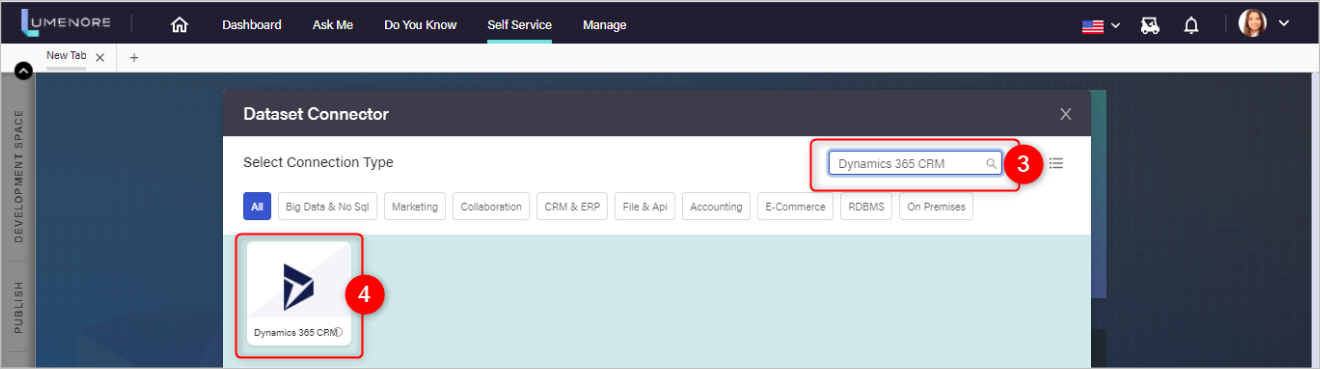
- Search Dynamics 365 CRM
- Click Dynamics 365 CRM.
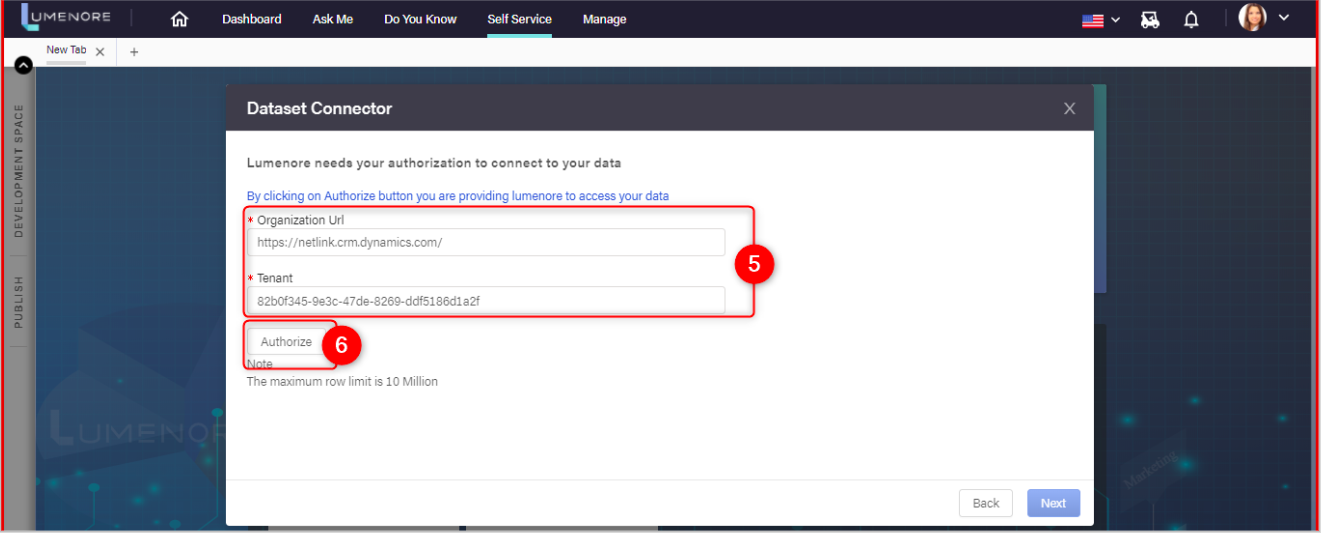
- Enter INSTANCE URL. &Tenant ID.(if you don’t know Instance URL and Tenant ID Click Here.)
- Click Authorize
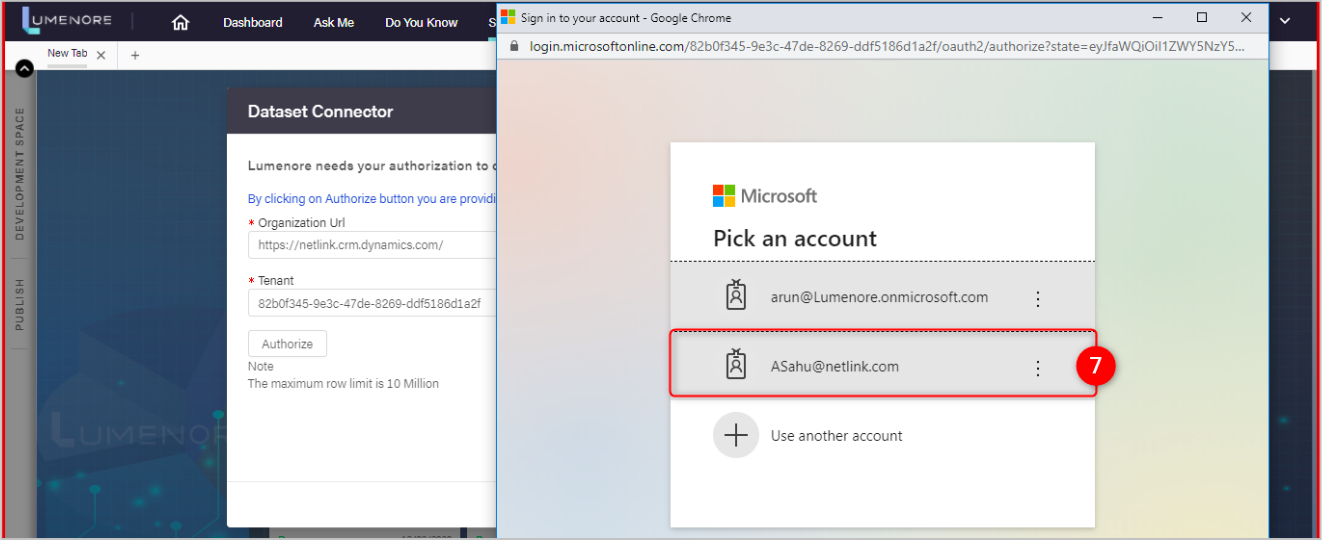
- Select Account for login.
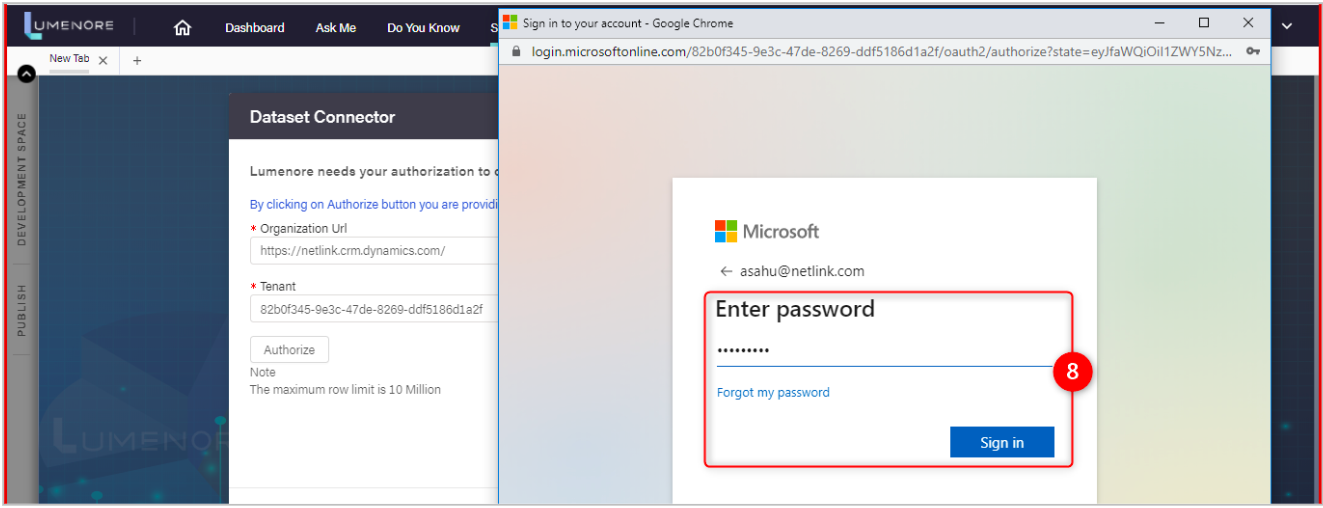
- Enter details, click Sign In.
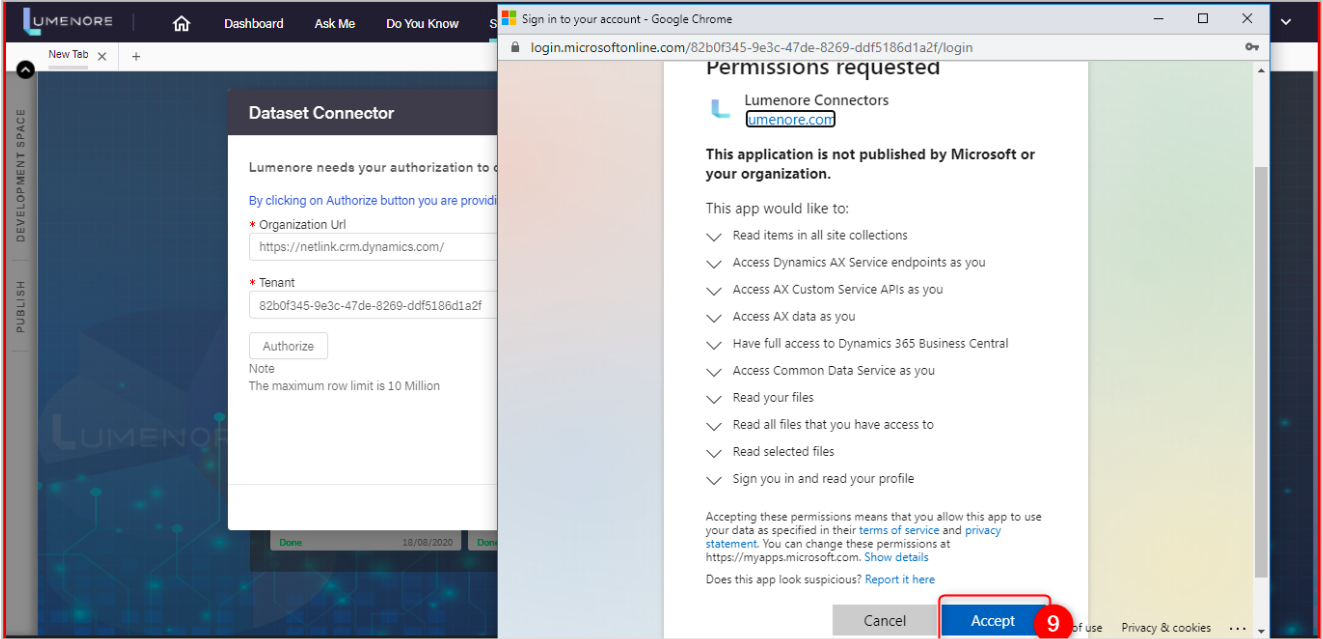
- Allow permissions, click Accept.
- Upon successful authorization, click Next.

- Click the check box(es) to Select Tables.
- Click the check box(es) to select columns.
- Click Preview.
- Click Save.

- Name the Dataset
- Click Ok.

Note: Once you have chosen the tables needed to calculate the KPI for analysis requirements and saved the dataset, you can create the business model and dashboard. Instructions are available in the Self-Service section of the Lumenore User Manual.
How to get Instance URL and Azure Active Directory Tenant ID?
As a preliminary step, we need to know the Instance URL of Microsoft Dynamics 365 CRM and Azure Active Directory Tenant ID to enter into Lumenore Connector Screen.
How to get the Instance URL of Microsoft Dynamics 365?
These steps show you how to move the CRM data from Microsoft Dynamics 365:
Log in to Dynamics 365 online.
- Sign in to your Microsoft Dynamics CRM account.
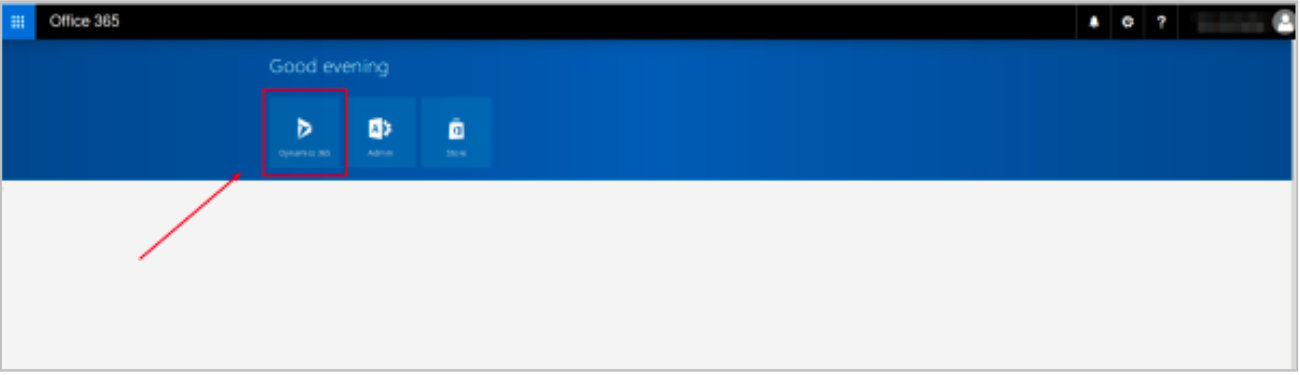
- Press on the square “Dynamics 365” on the left side of the page.
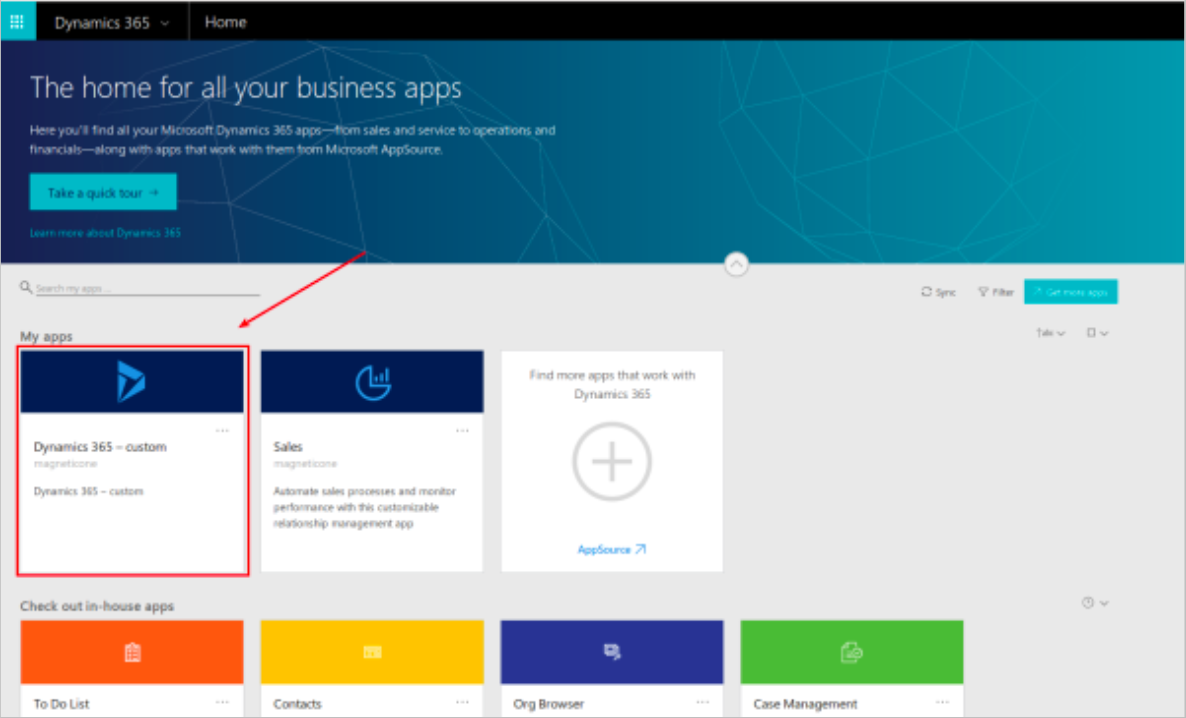
- Then, go to “My App” and click on the square “Dynamics 365 – custom” and you will be redirected to your Microsoft Dynamics CRM.
- After that, go to your browser address bar and copy a link address(from the beginning till the /main.aspx/). It could contain the words “dynamics.com” or even not.
E.g., If your URL is https://crm.your-systems.com/your-system/main.aspx. You should copy “https://crm.your-systems.com/your-system/” and paste it in the “Lumenore Dynamic 365 Connector Screen.”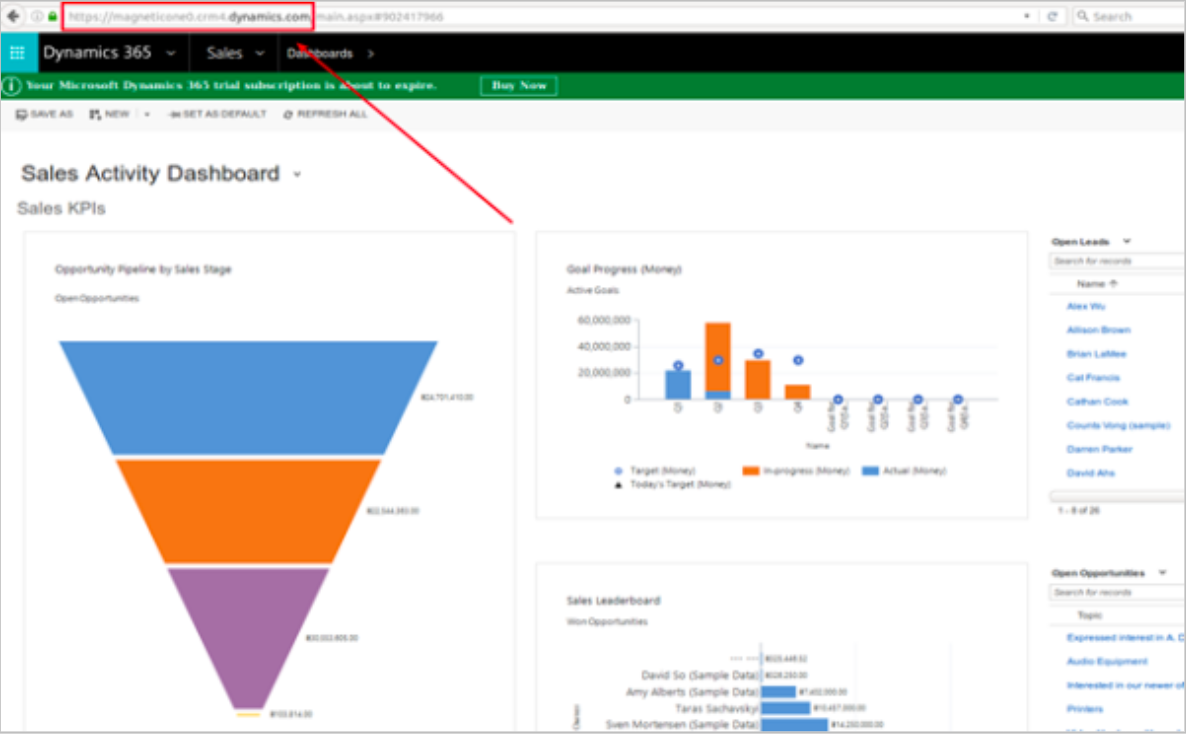
- Then, paste the copied link into the “Lumenore Dynamic 365 connector screen,” as well as your email and password and proceed with your CRM migration.
How to find your Azure Active Directory tenant ID
- Sign in to the “Portal.azure.com” through administrator user.
- Select Azure Active Directory.
- Select Properties.

- Then, scroll down to the Tenant ID Your tenant ID will be in the box.

